Custom Keyboard Build
I’m often surprised by the strange interests that people take on and then take way too far. Over time I’ve fallen victim to just that with computer keyboards. With my latest, I built a custom keyboard tailored specifically to me.
I’m working from my computer all day. I figure there is no reason to skimp on the tools. If anything is going to make me faster or feel more comfortable, it’s a worthy investment. Of these, the keyboard is of special importance because most of my interaction is through this one device.
Over time I’ve gotten smaller and smaller keyboards. My first mechanical keyboard didn’t have a number pad. My second didn’t have an arrow cluster or F1-F12 keys, and this one doesn’t even have a number row. The way it works is that these other keys are still available, but only if you hold down another key. It’s like having more Shift/Ctrl/Alt keys. I’ve found that I like condensing like this because I’ll often hit the wrong key on larger keyboards. I have trouble spatially identifying where some keys I need are located, at least without sometimes looking. By condensing the keyboard, it makes it easier for me to know exactly where things are because there are fewer keys to reach.
Further, this keyboard is programmable, so I can make any key act as I want it to. It’s easy to remember positions for things when you’ve designed it to be that way.
The rest of this is going to be more of a guide to the build, for anyone that may stumble upon this through Google. There’s not a huge amount of info on how to do this, so I thought I’d help by posting a build log here.
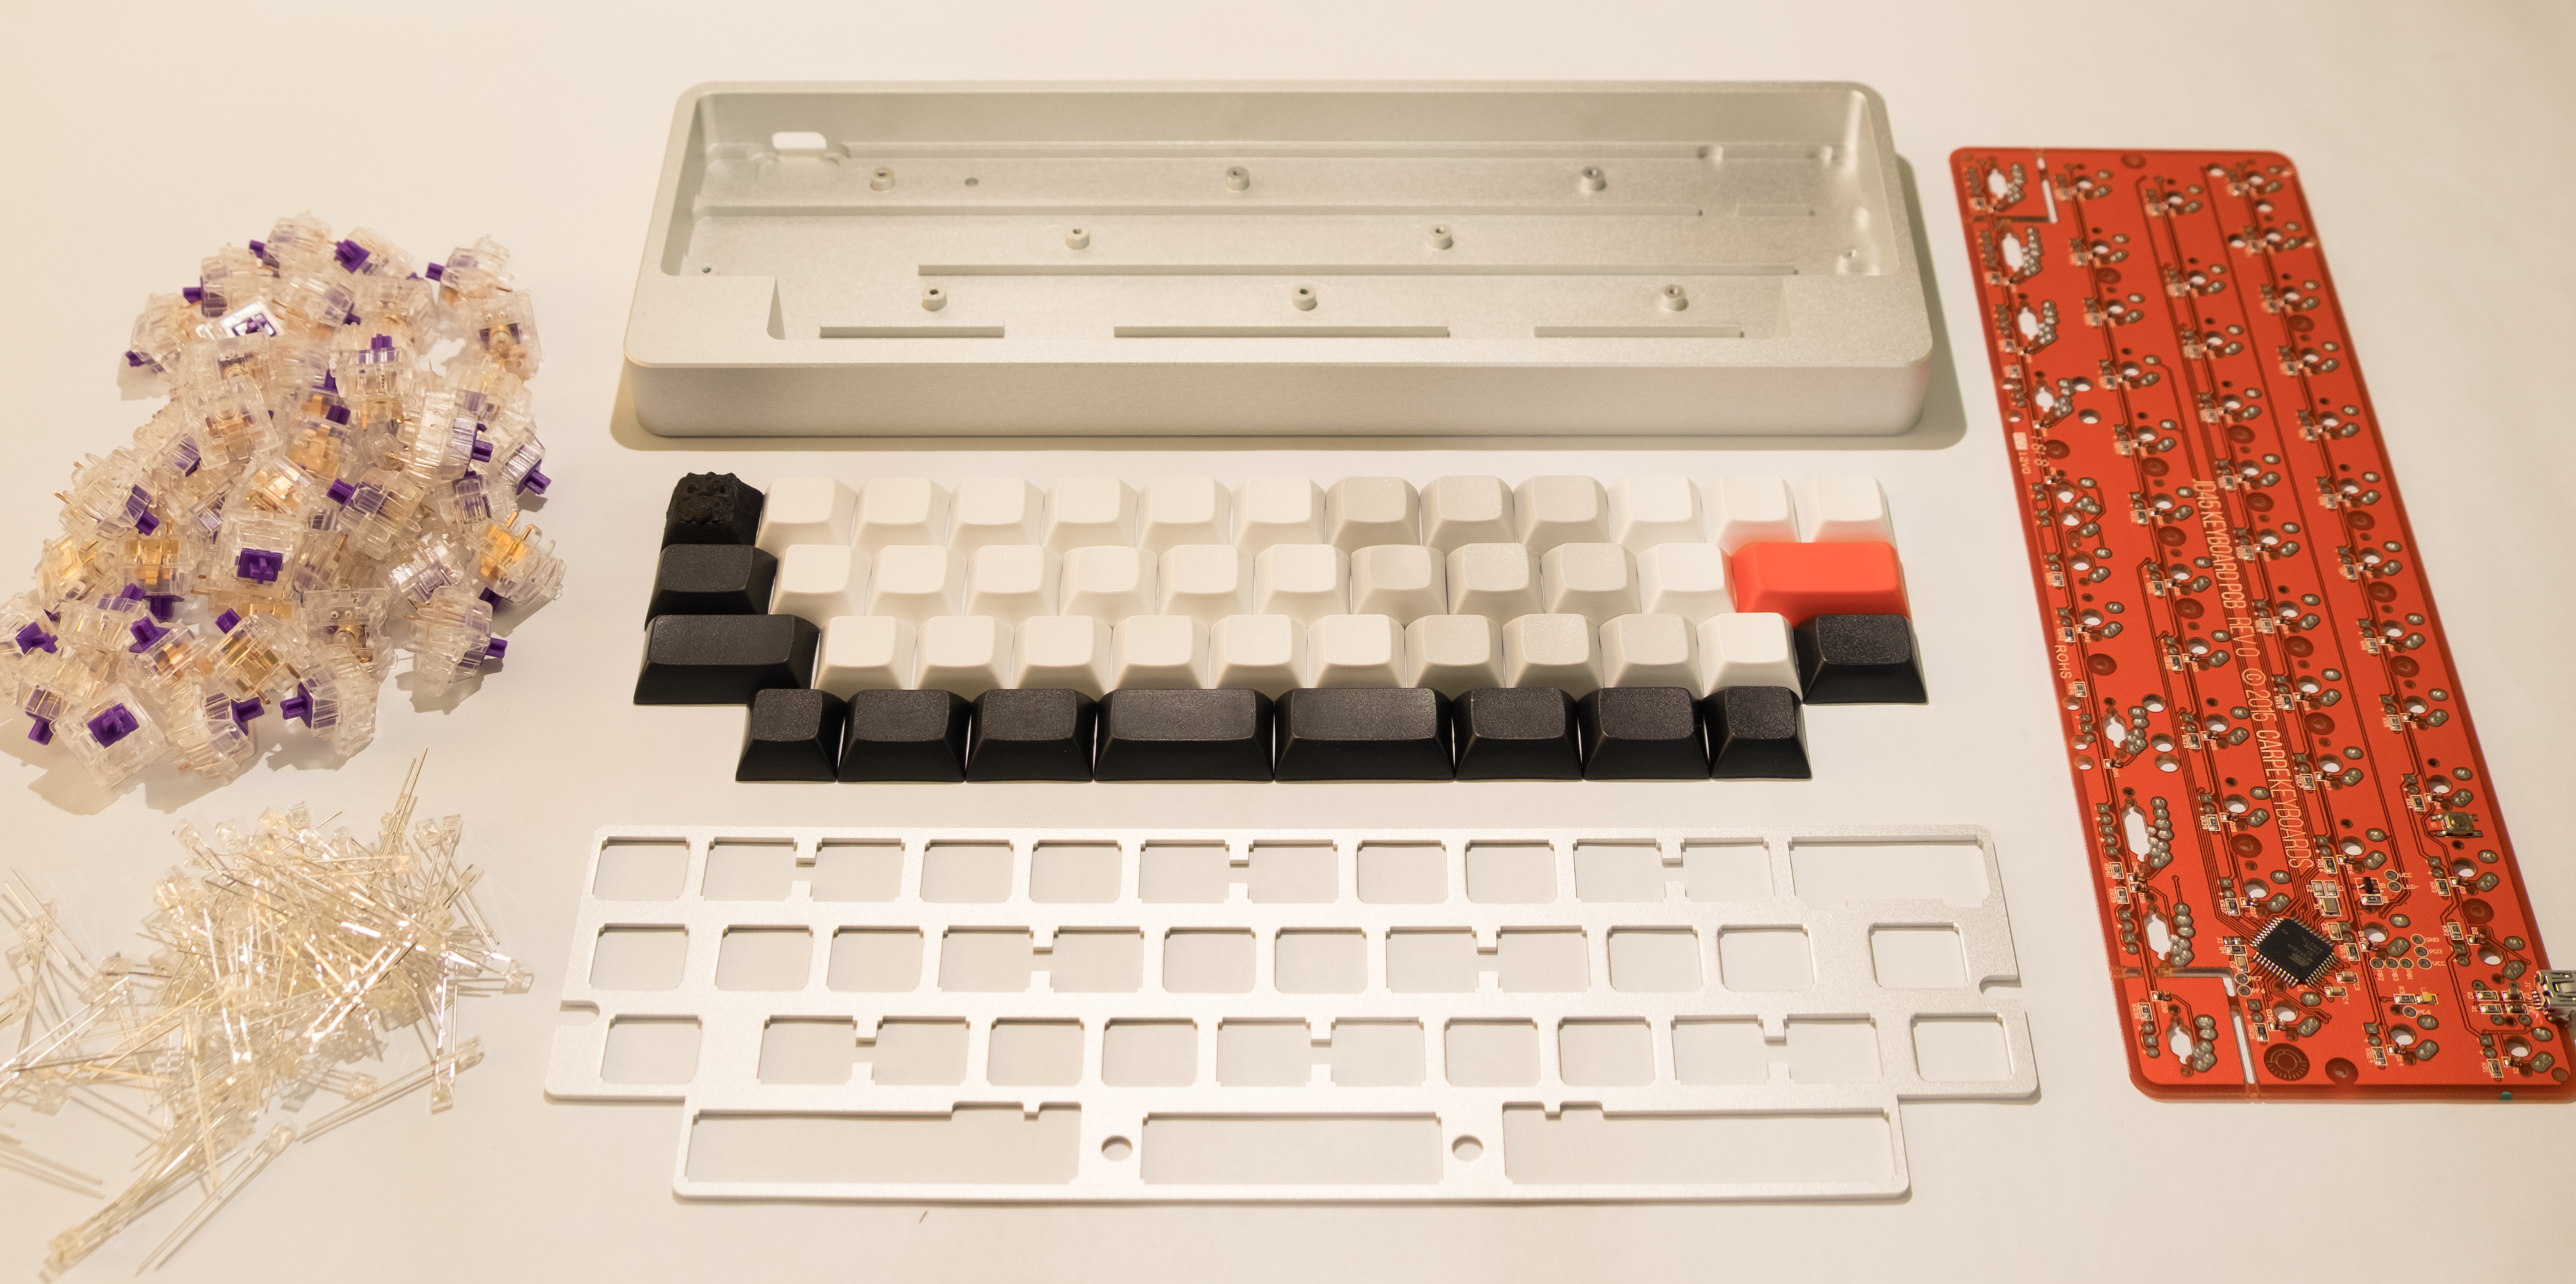
Case and PCB This is the JD45 staggered 40% layout, designed by Carpe Keyboards and manufactured by TEX in Taiwan. The whole process from ordering to delivery took about 6 months.
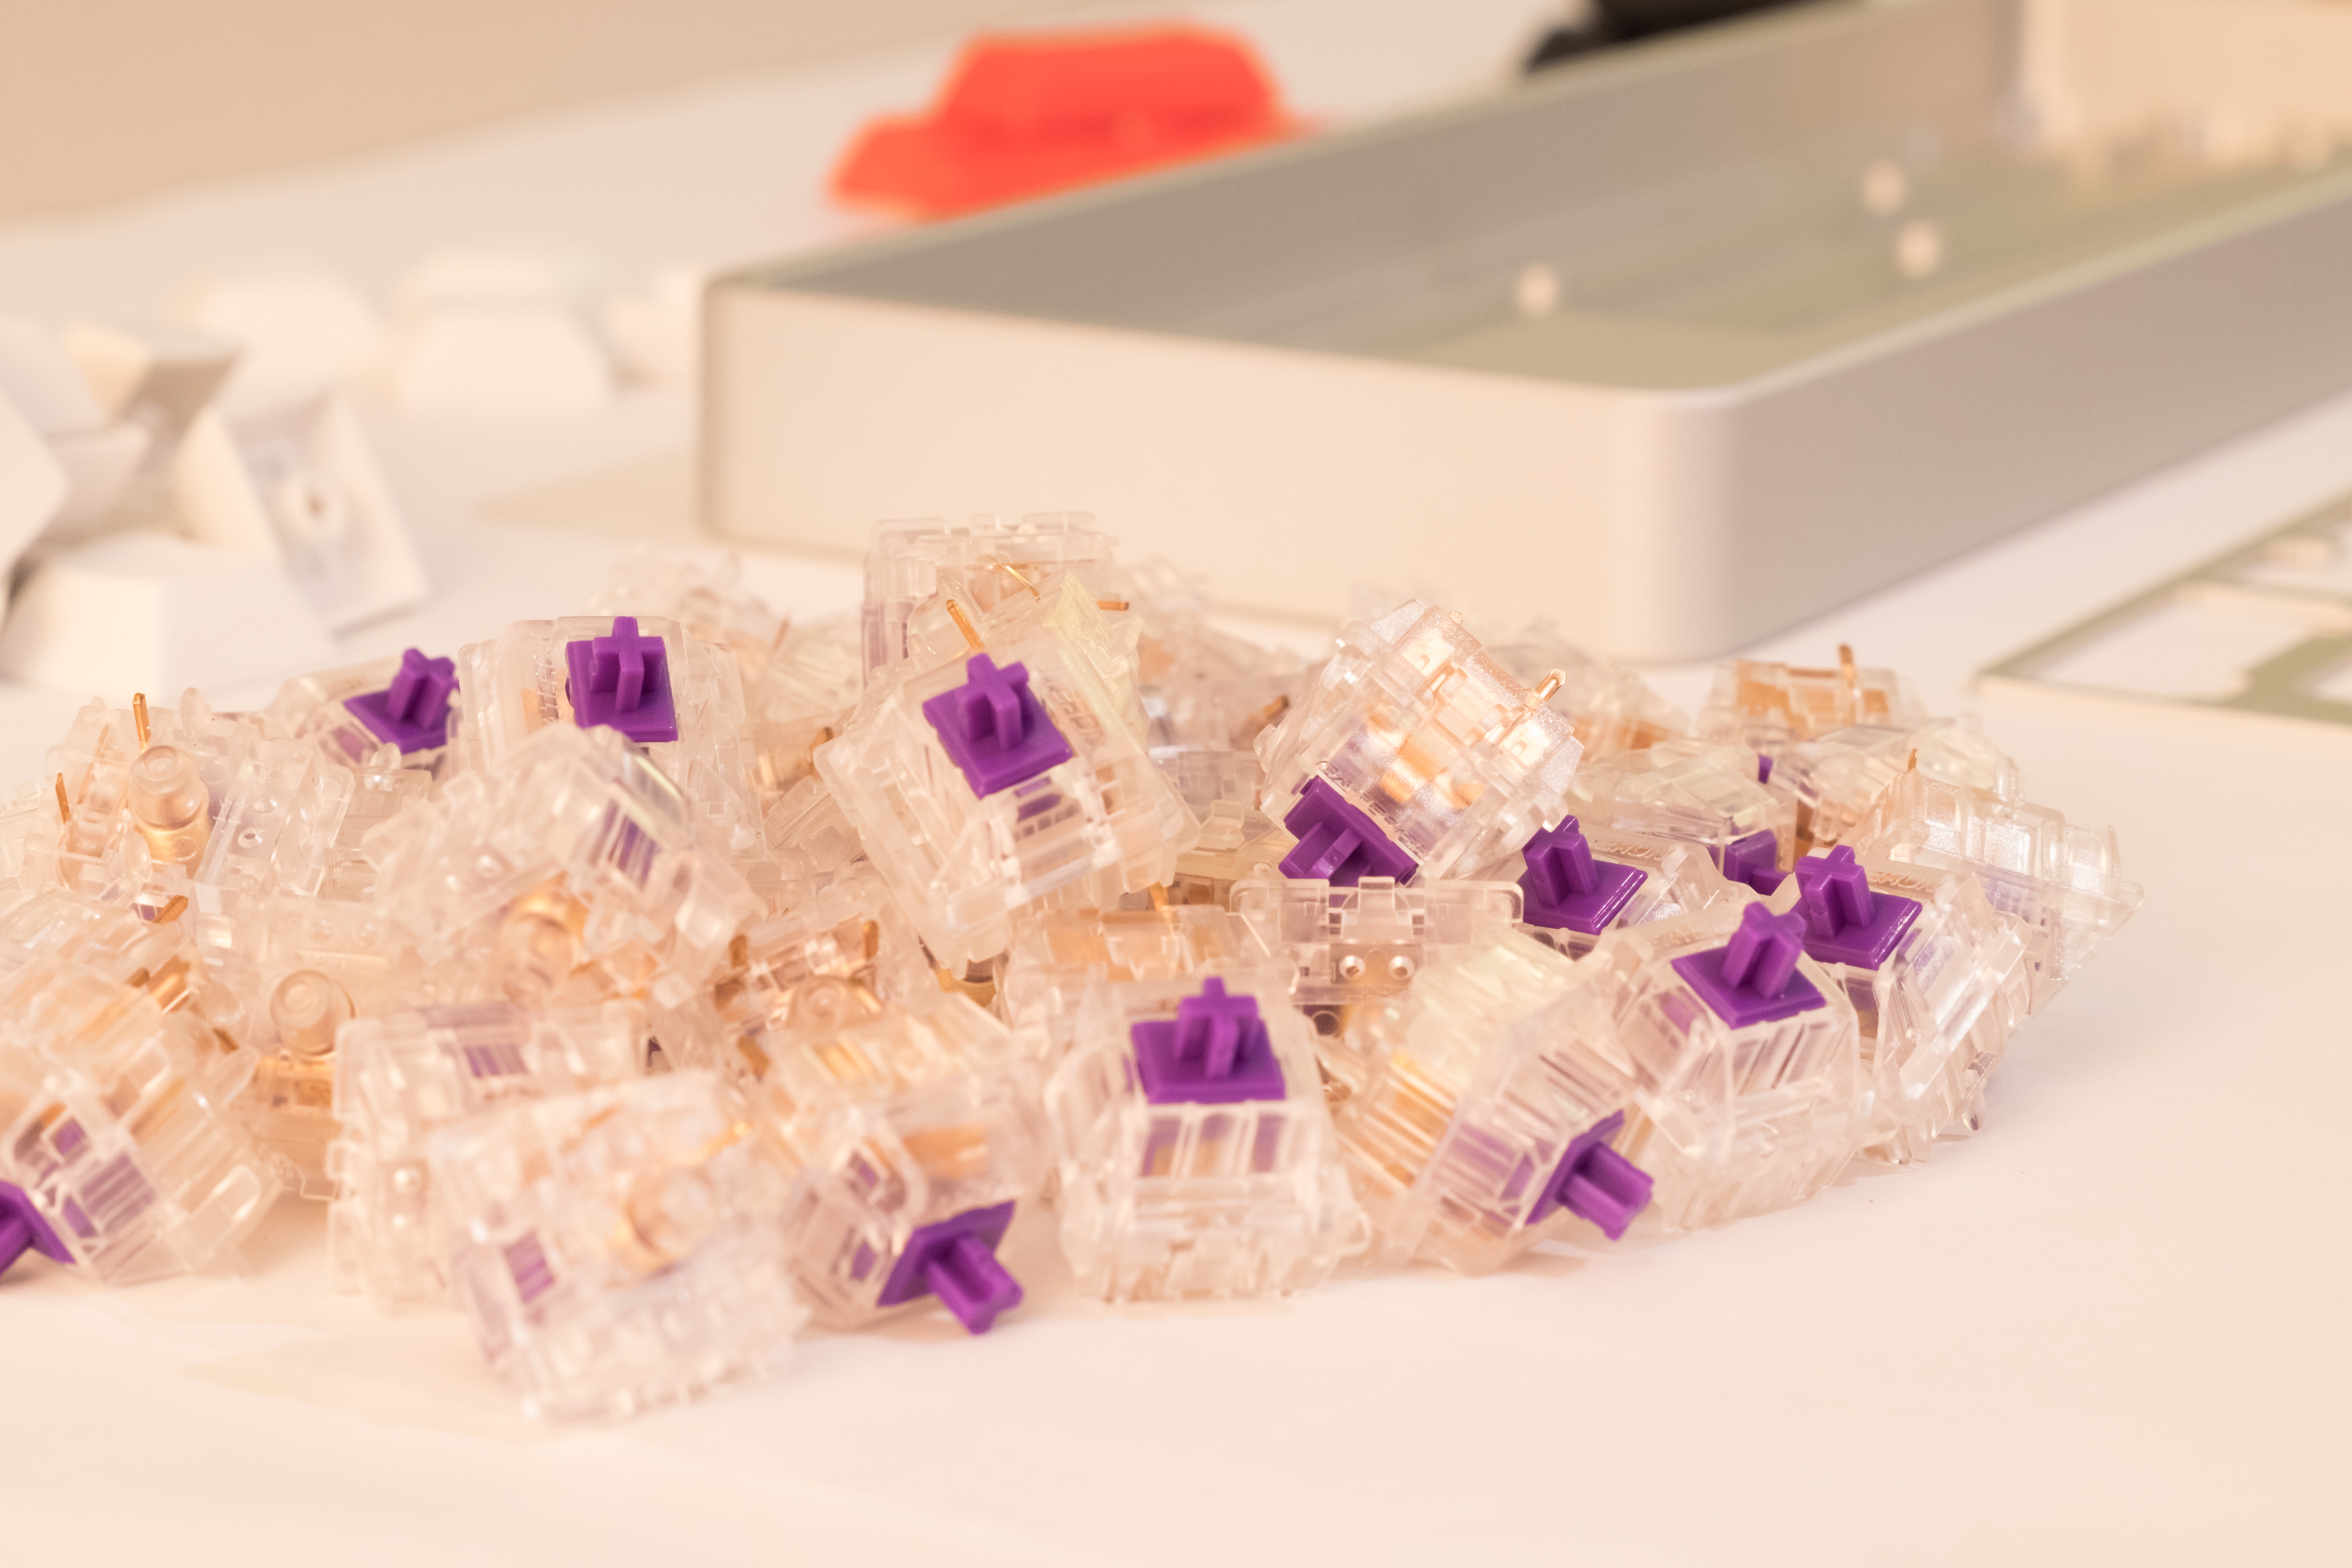
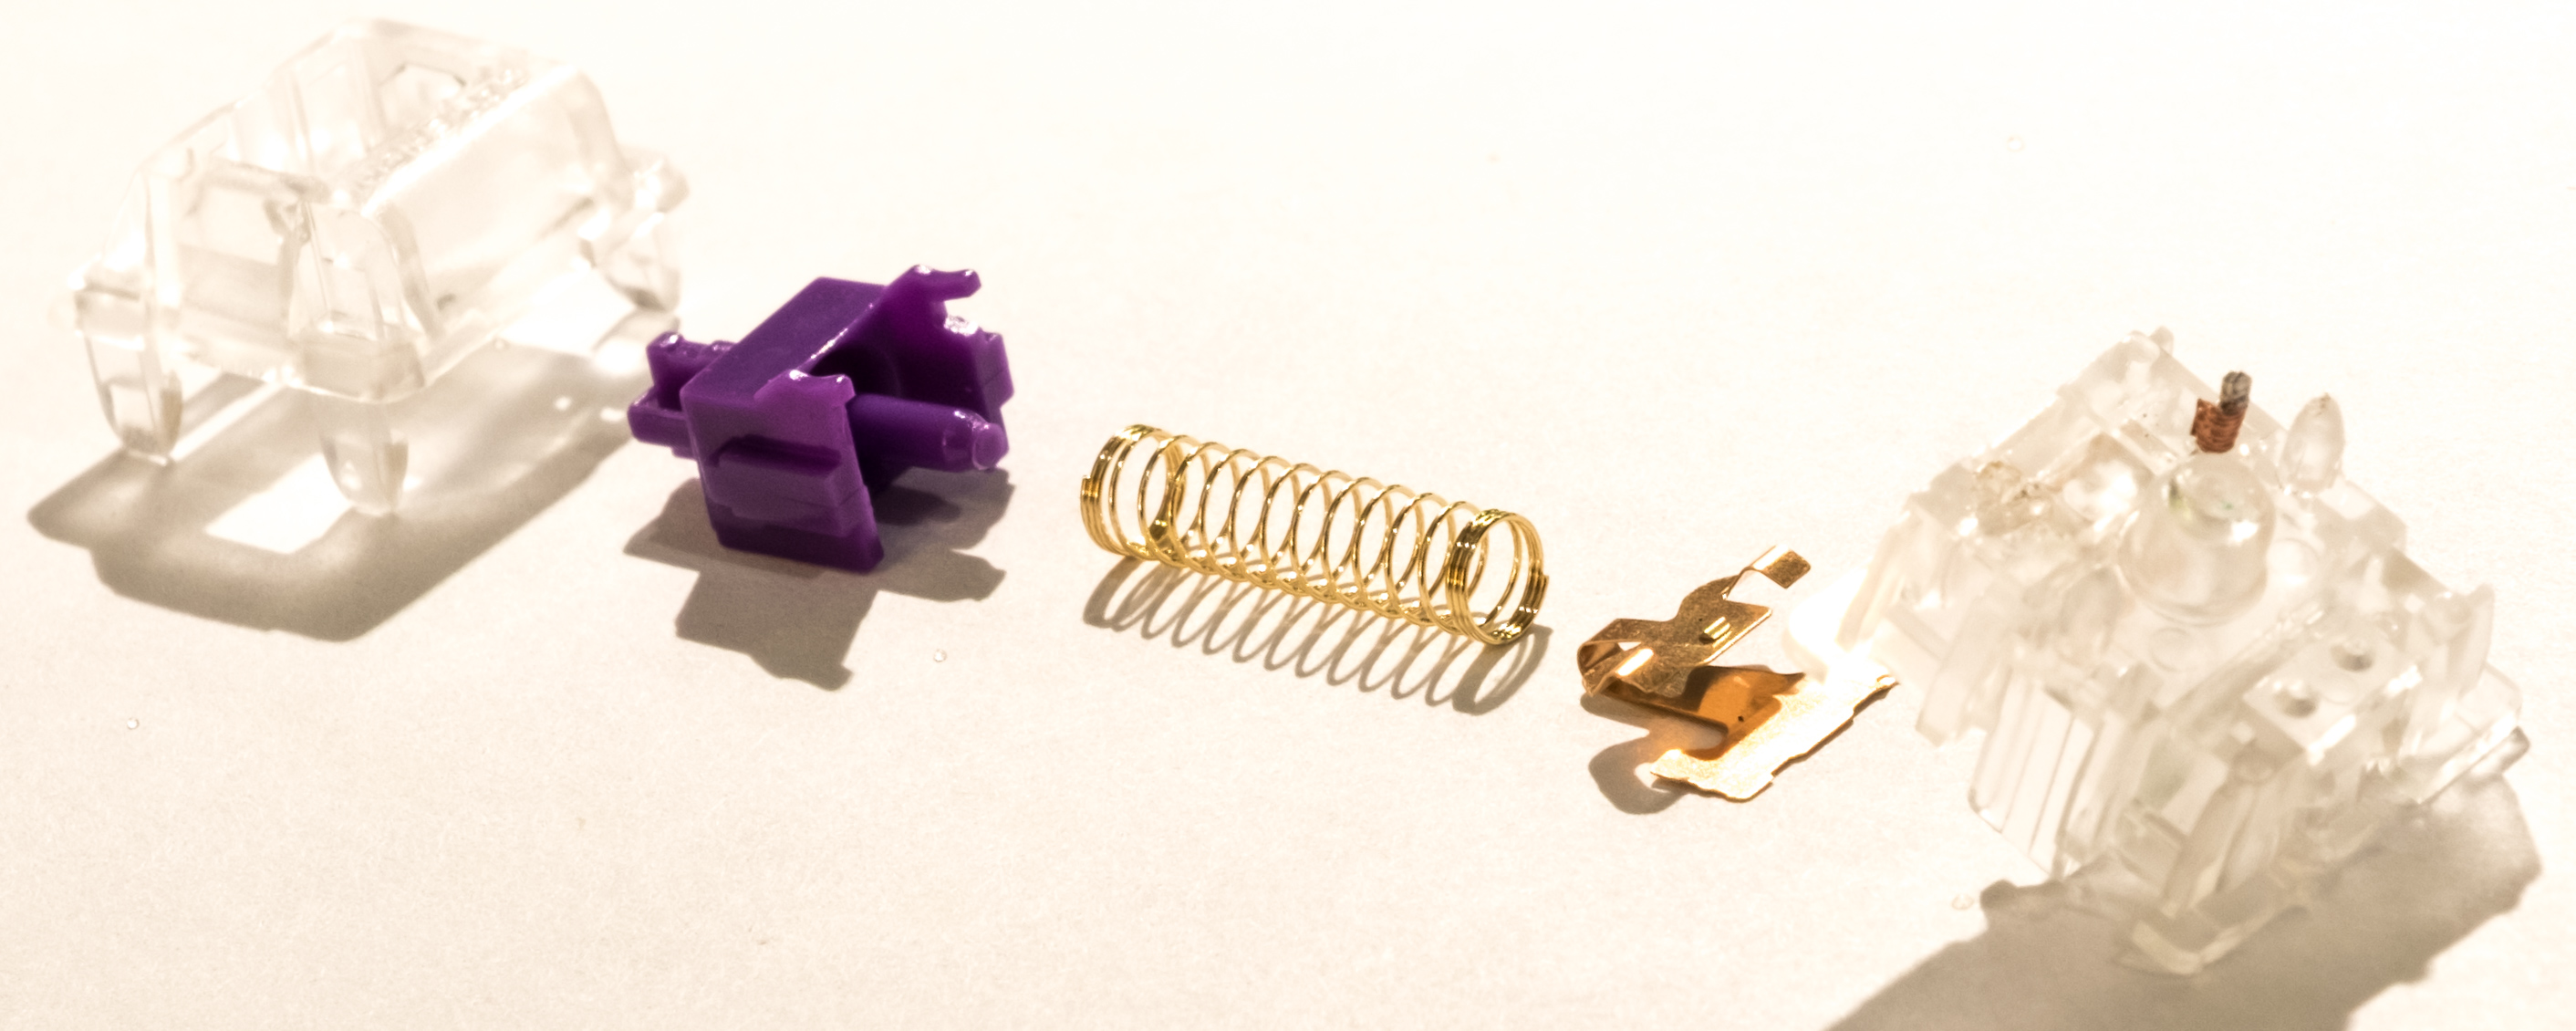
Switches R3 Zealio 67-gram. I don’t like MX-based switches, but sourcing keycaps for this was going to be an issue, so I had to go with the most popular option. The Zealios switches are known to be one of the most refined options. I chose the 67-gram option because the tactile bump is right at the top.
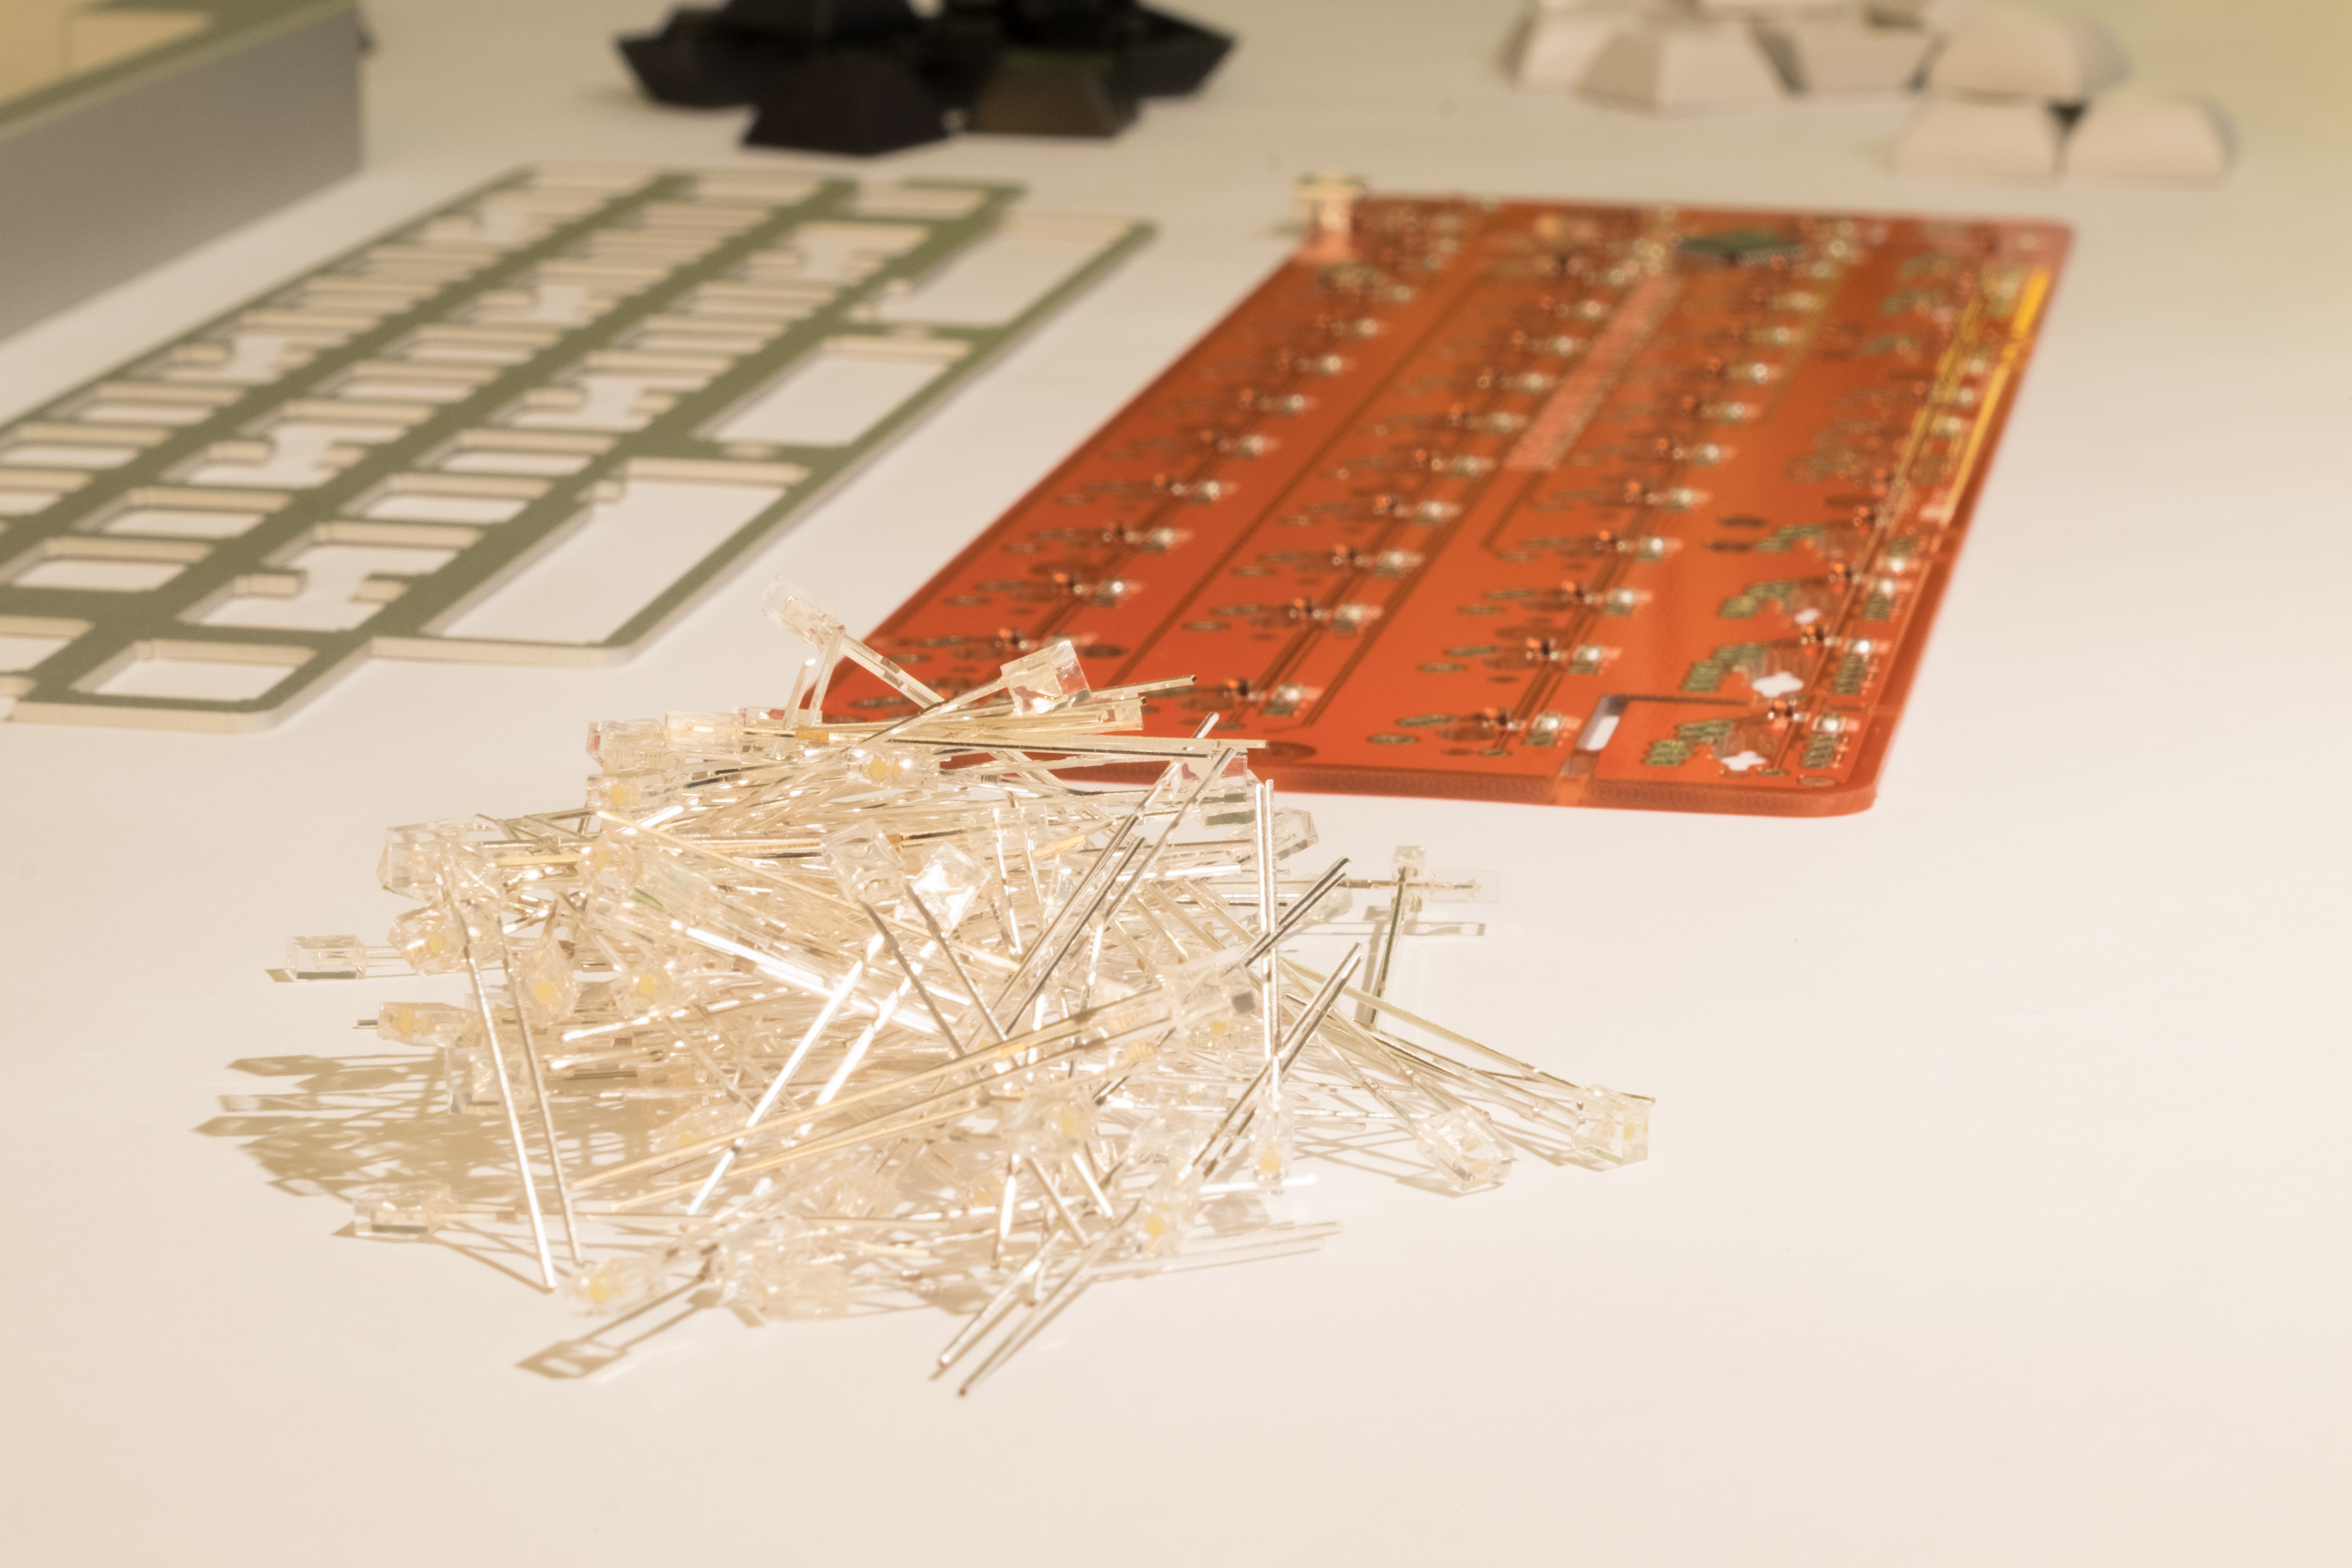
LED’s Standard 2x3x4mm water clear LED’s. I expected these to be a true white, but they have a blue tint, which was a little disappointing.
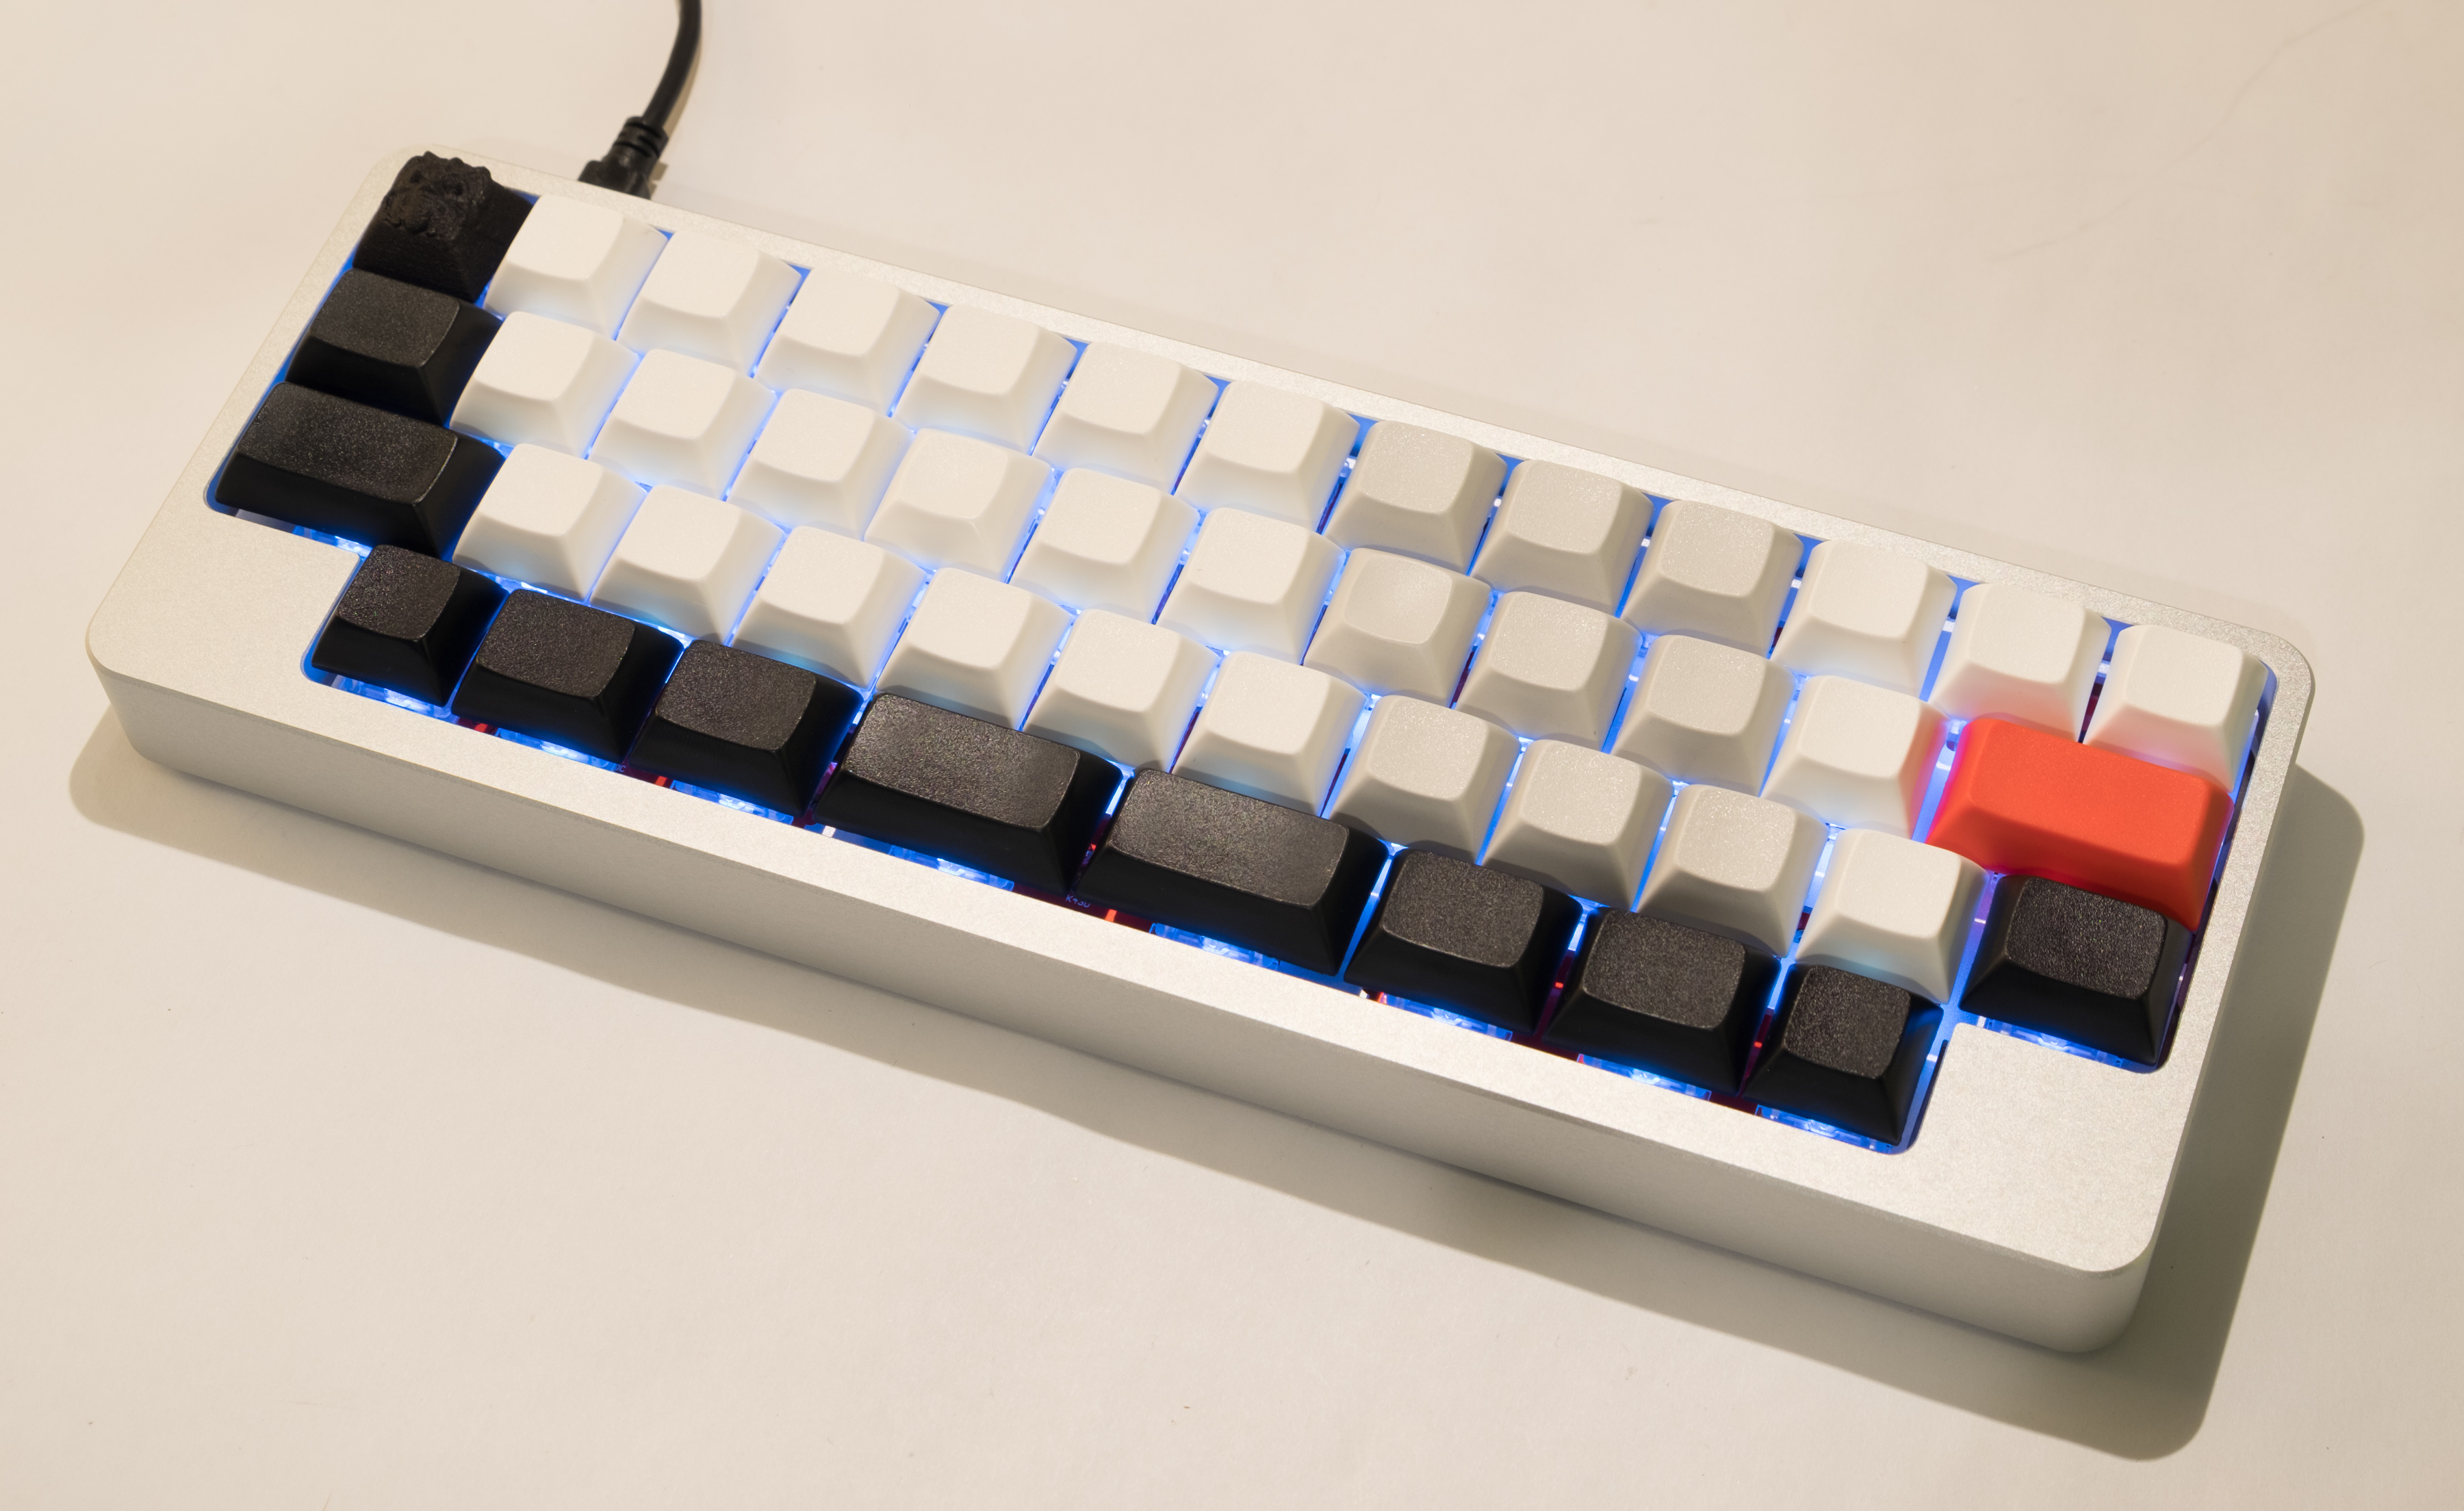
Keycaps This being a non-standard and possibly evolving layout for me, I decided on blank caps. I wanted to piece together SA profile, but I couldn’t find all the sizes I needed. I ended up going with Signature Plastics DSA keycaps. They’re too light and have this hollow resonance to them, which makes them feel cheap. I’m not really a fan for that reason, but they do look great and the texture is nice.
Edit: Most of the sound issue with the keycaps was actually caused by resonance of the aluminum top plate. This step is not depicted, but I ended up covering this with automotive sound dampening material, and it sounds much better than before. It’s still not as refined as I’d like, but it’s not annoying anymore.
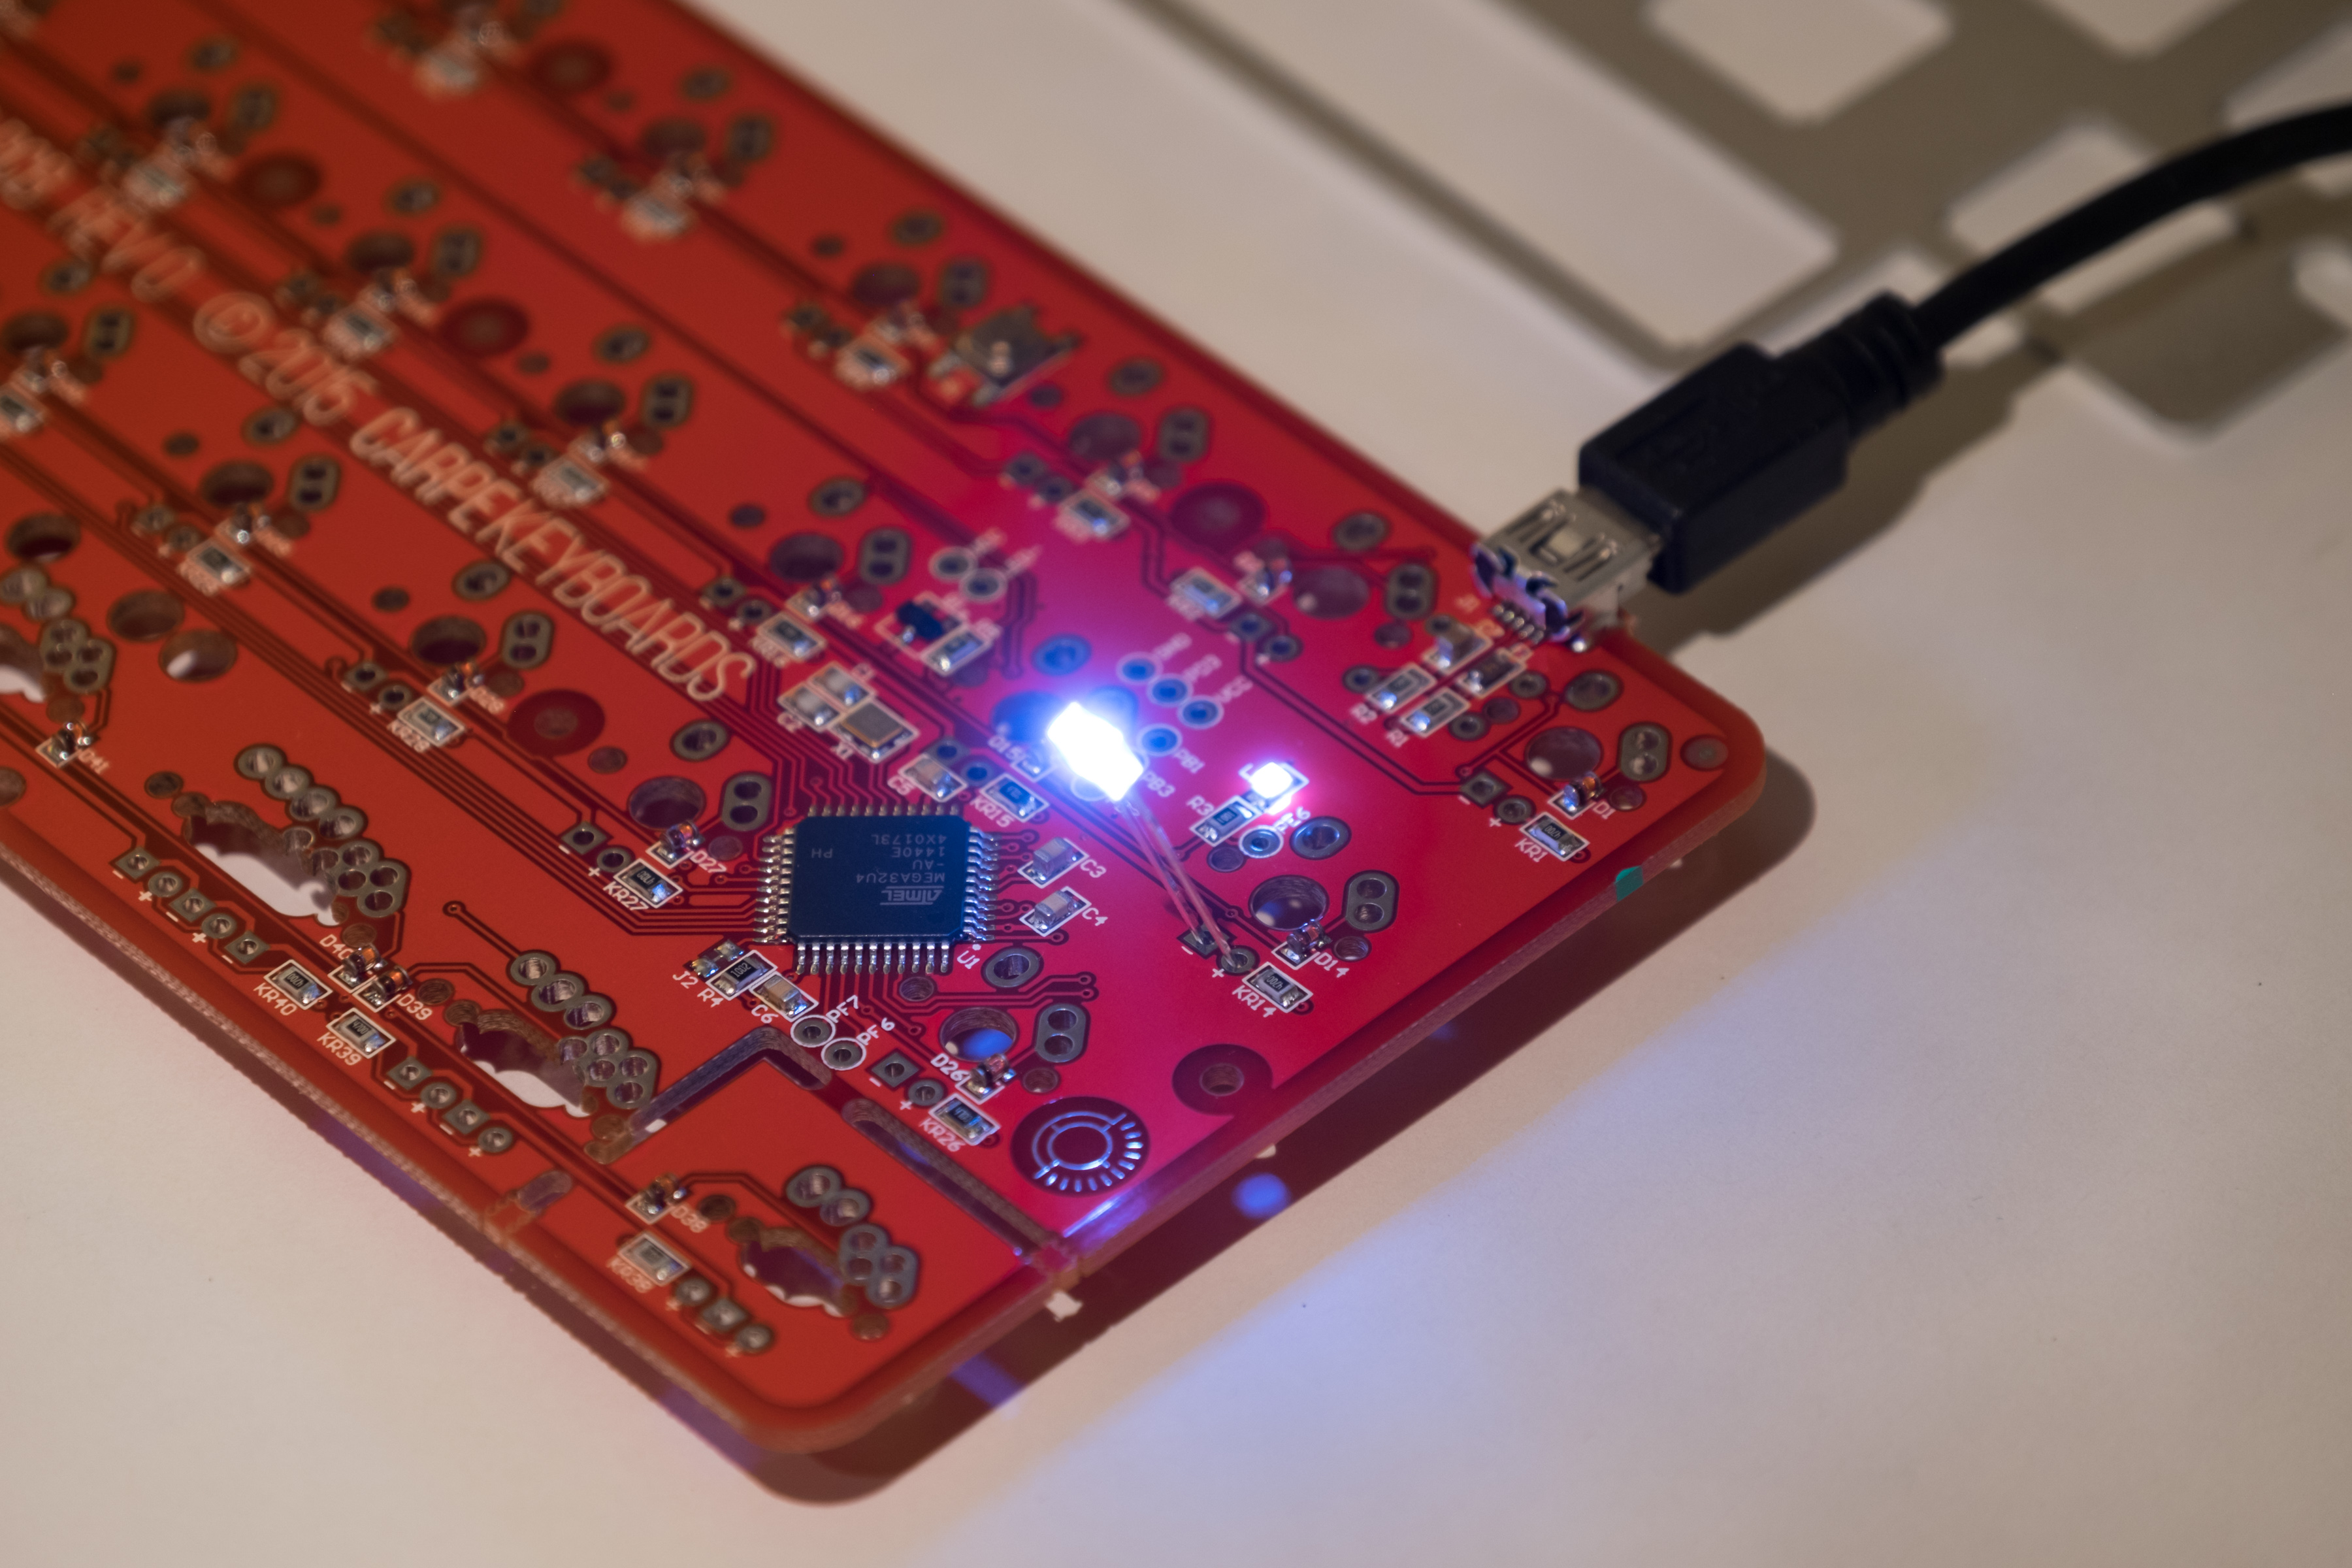
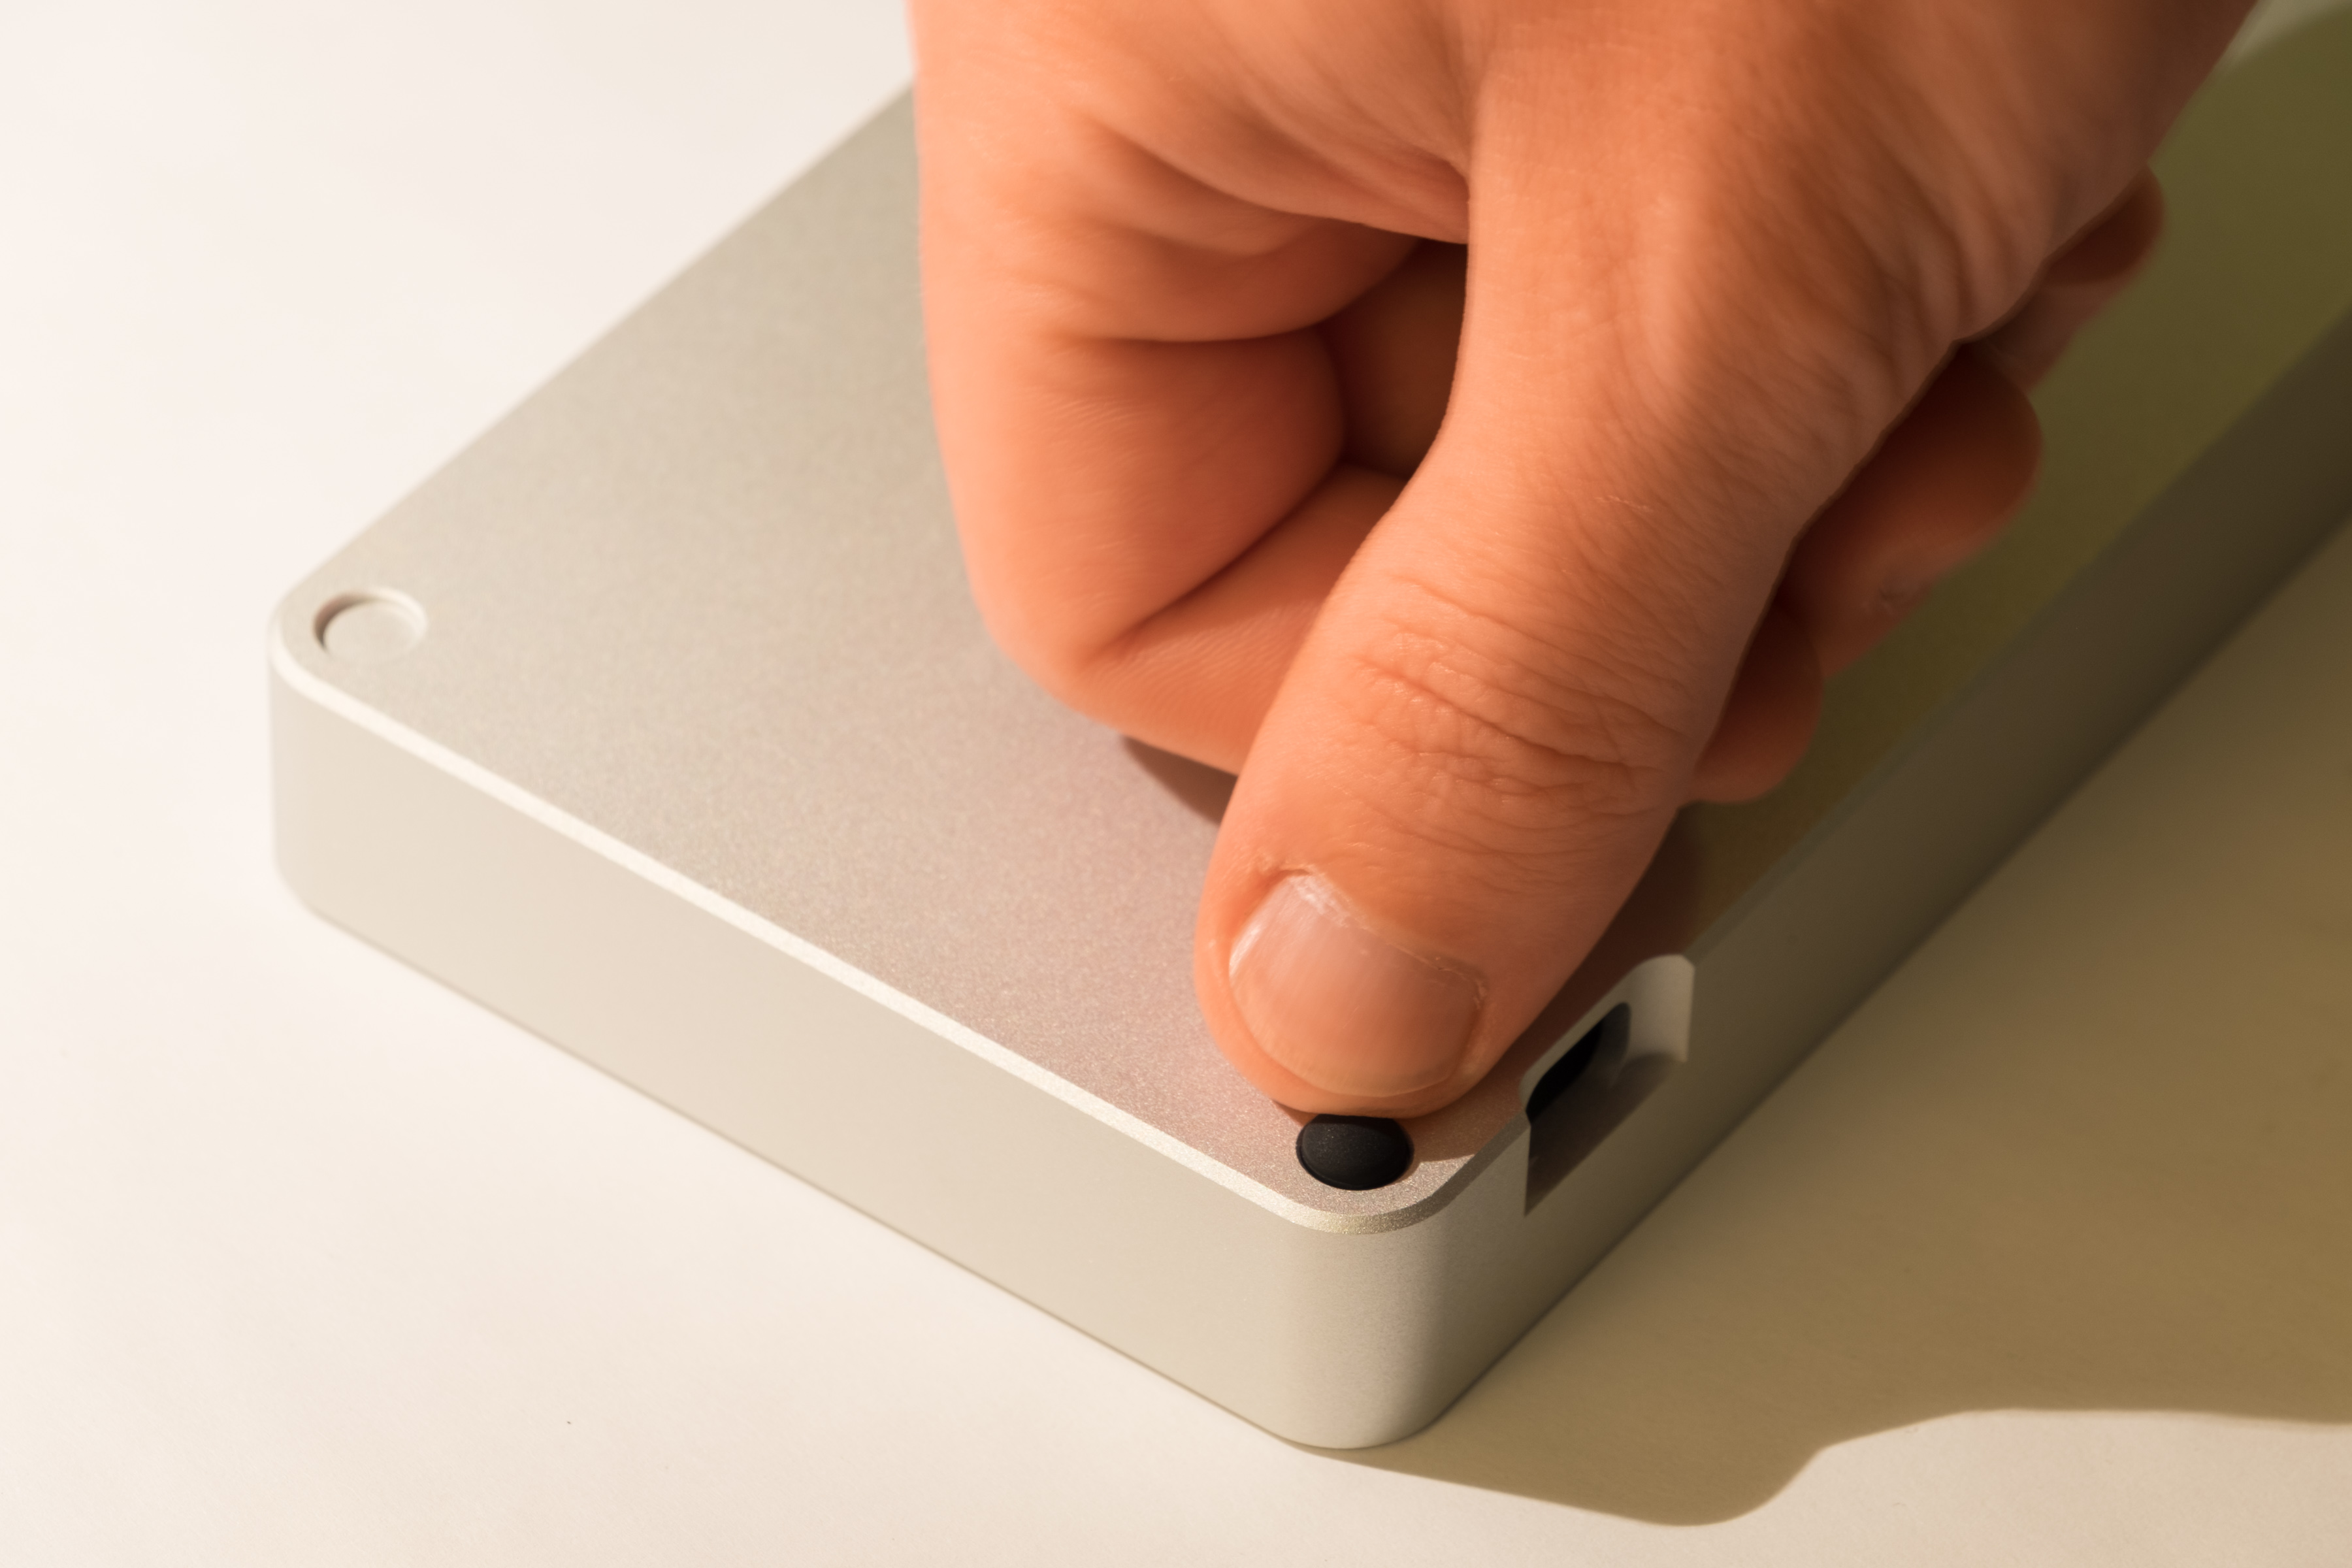
I started by plugging in the board and testing the LED’s. I hadn’t worked with these before, so I needed to check which end was positive (it’s the long end).

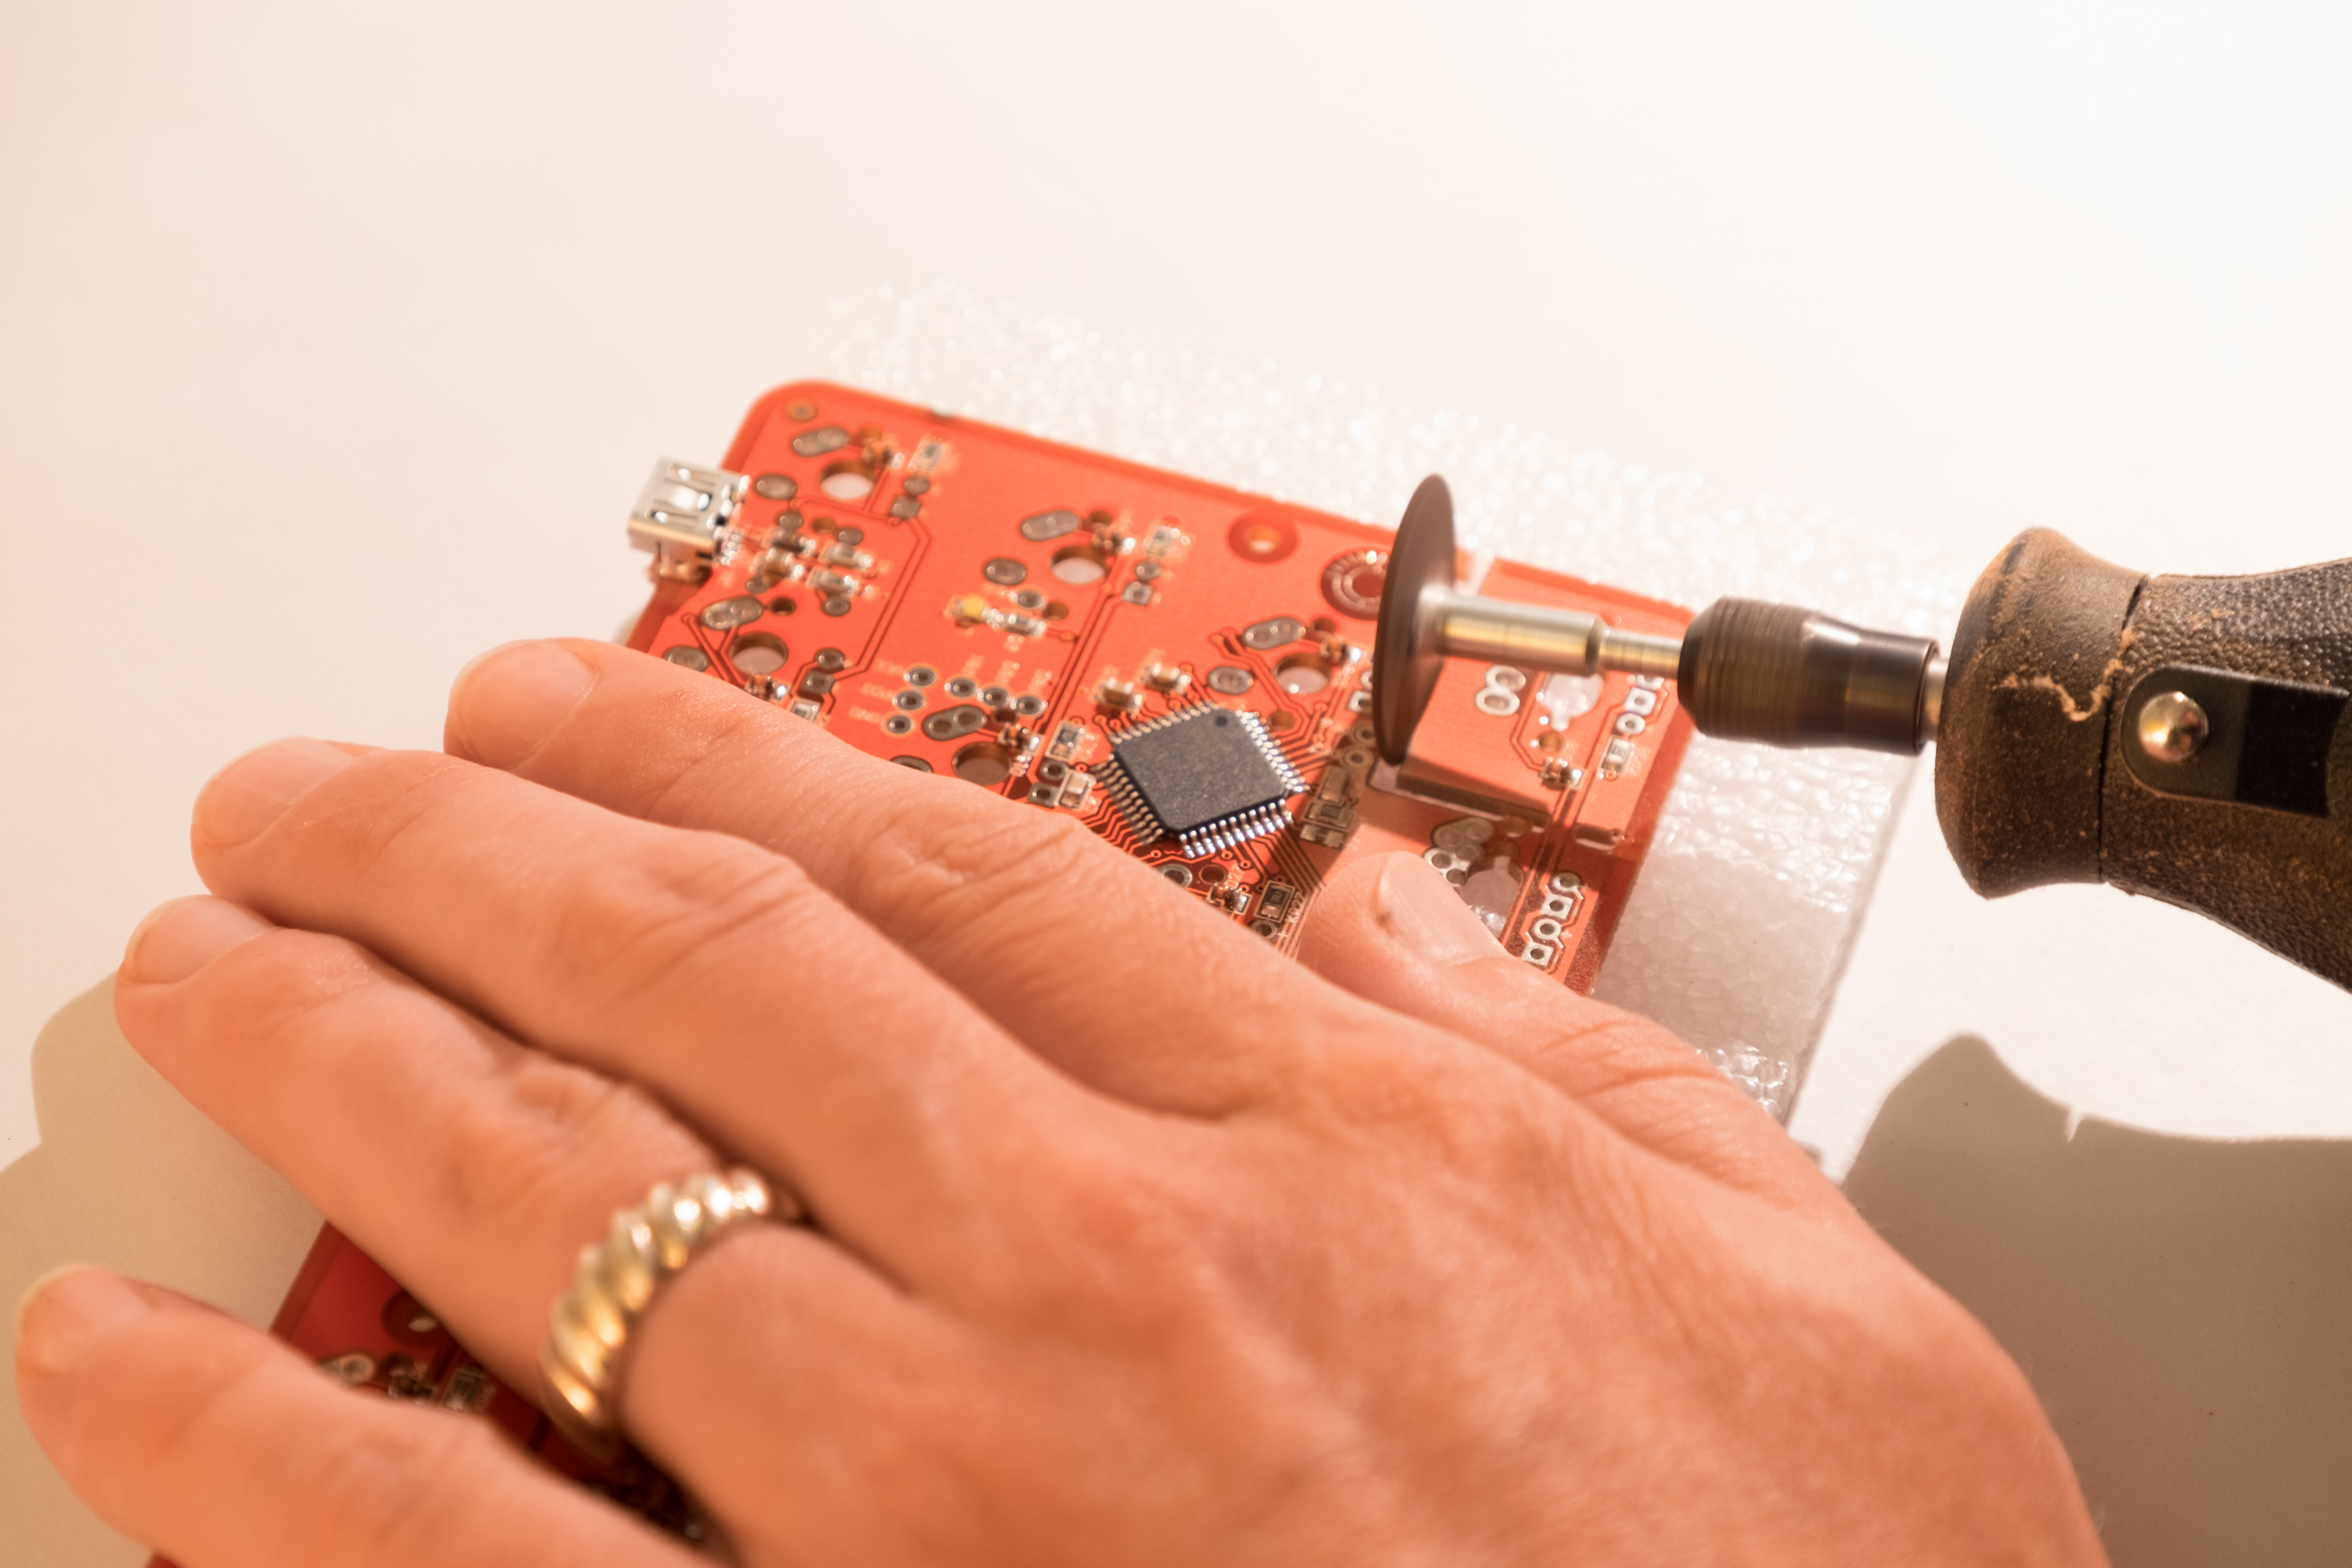
This case was offered with an option for blocked corners, which means there are no keys in the bottom corners. I had to first cut out the corners from the PCB in order to fit the case.
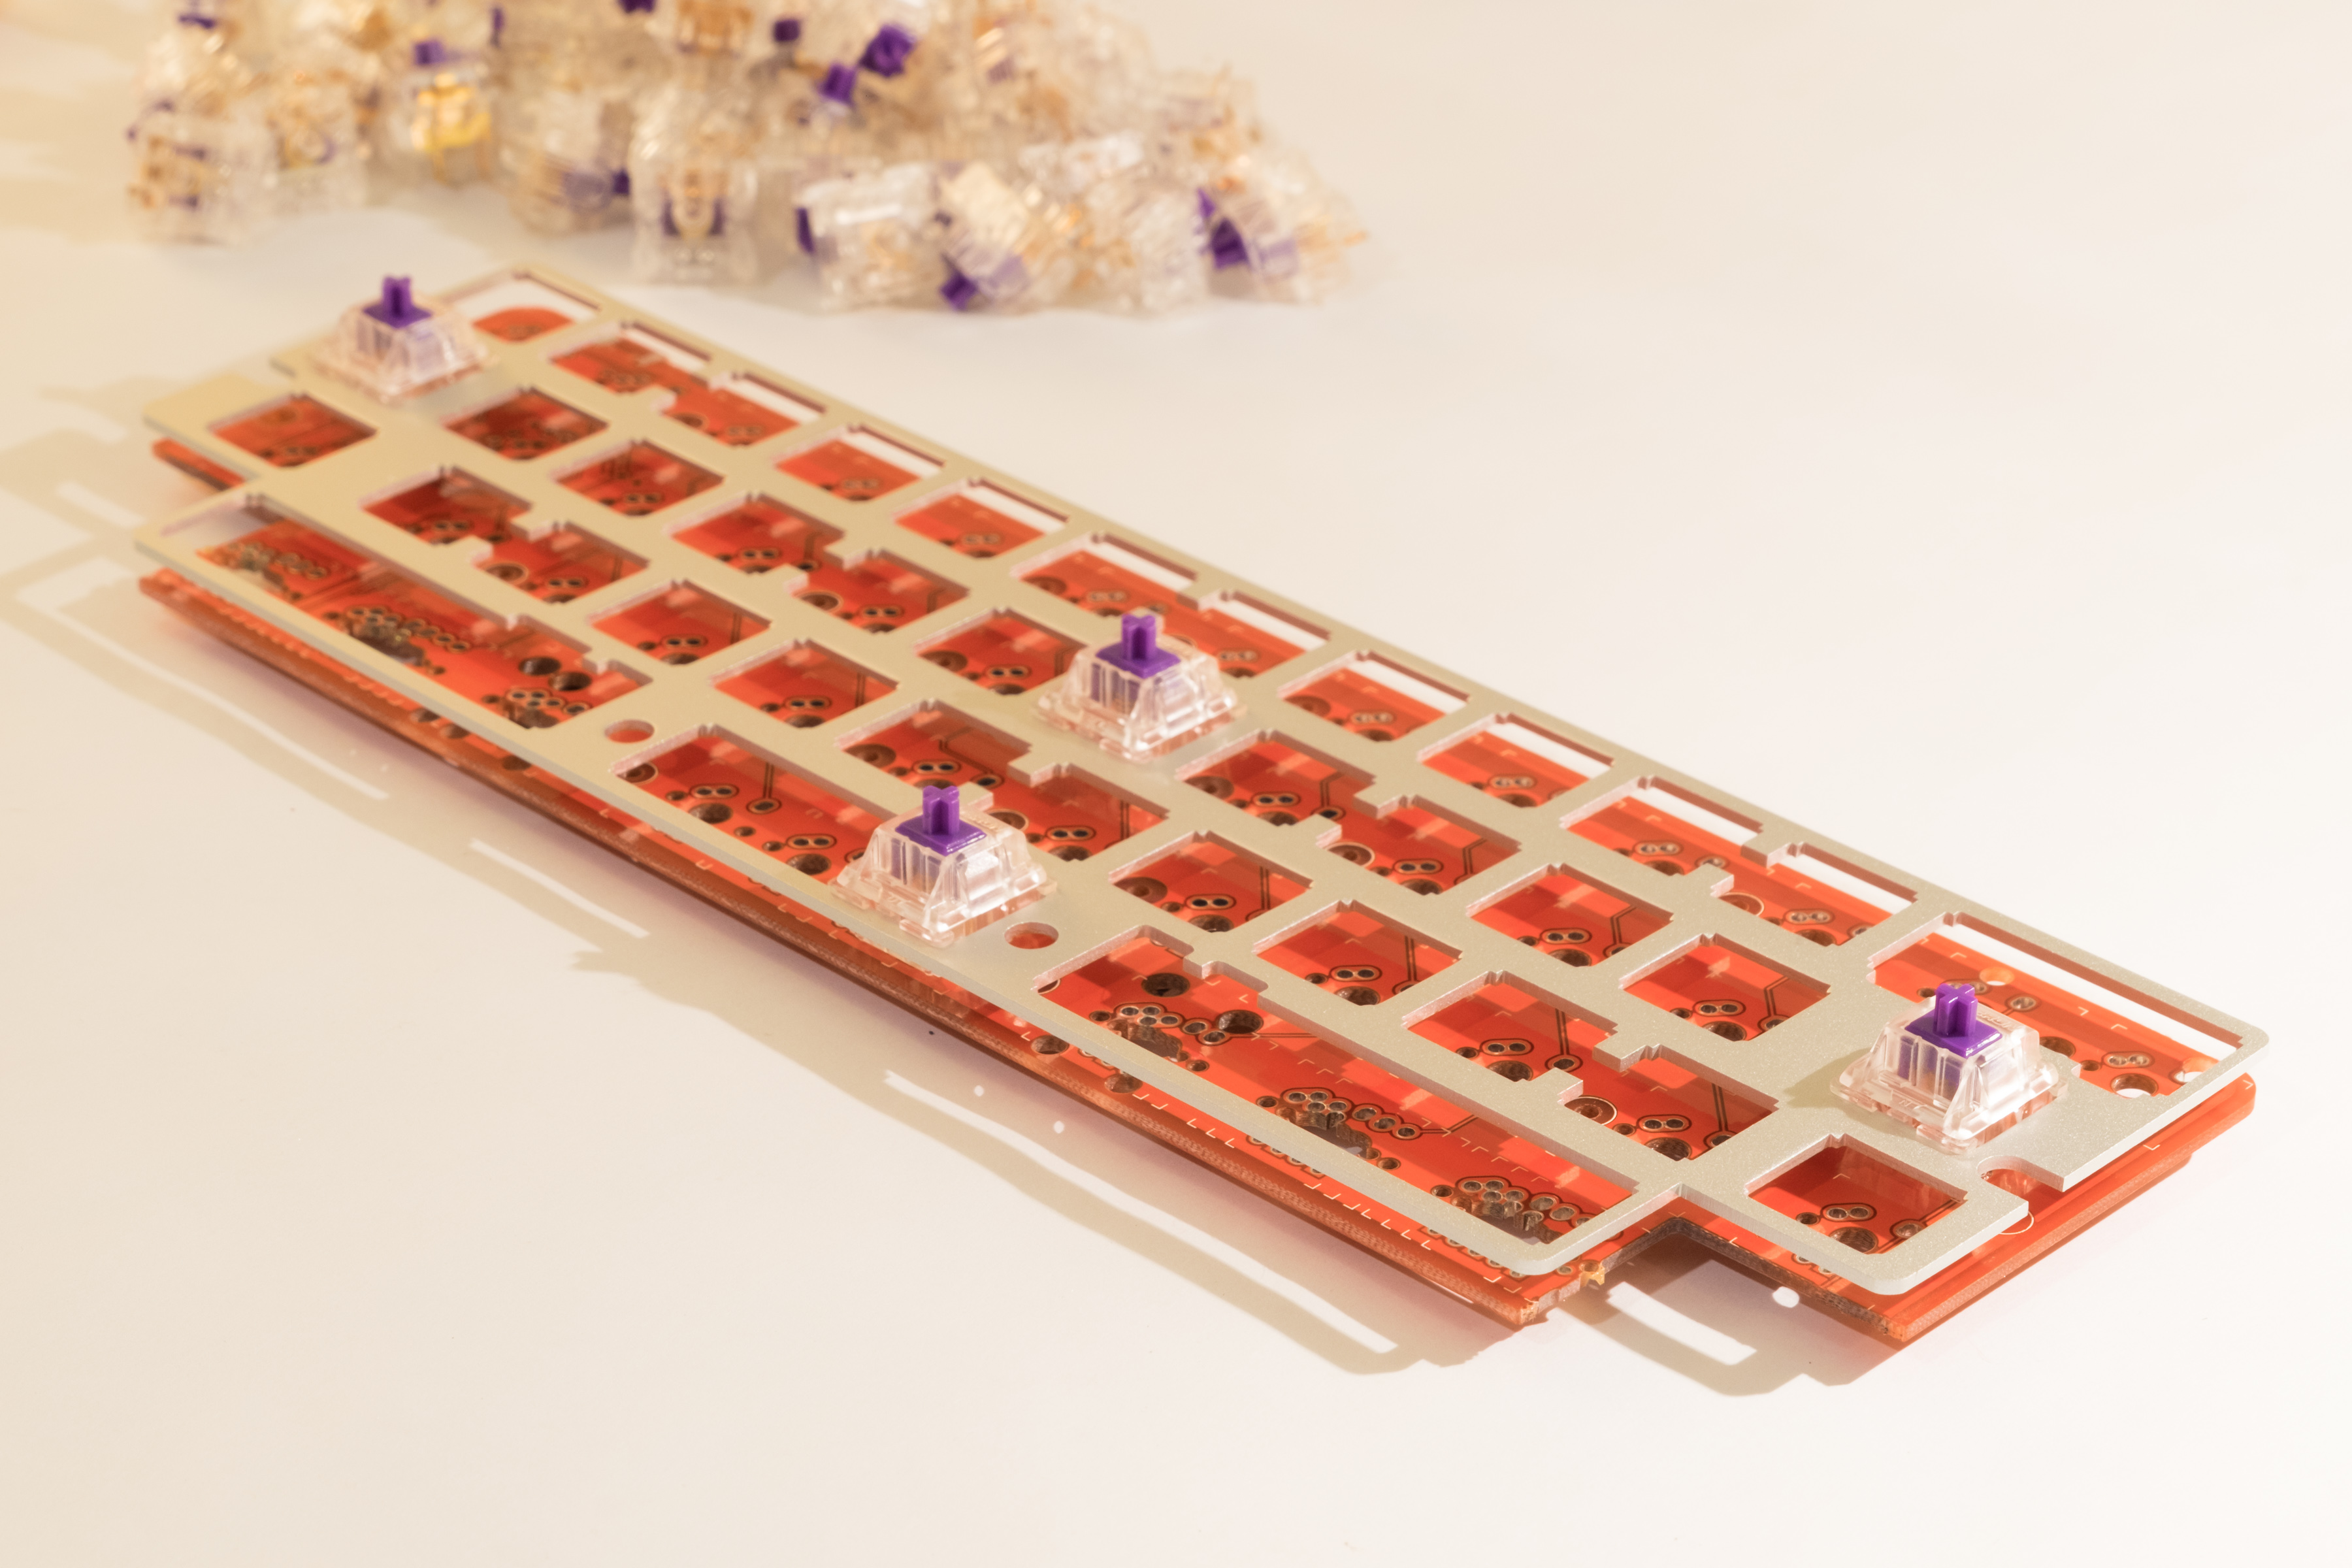
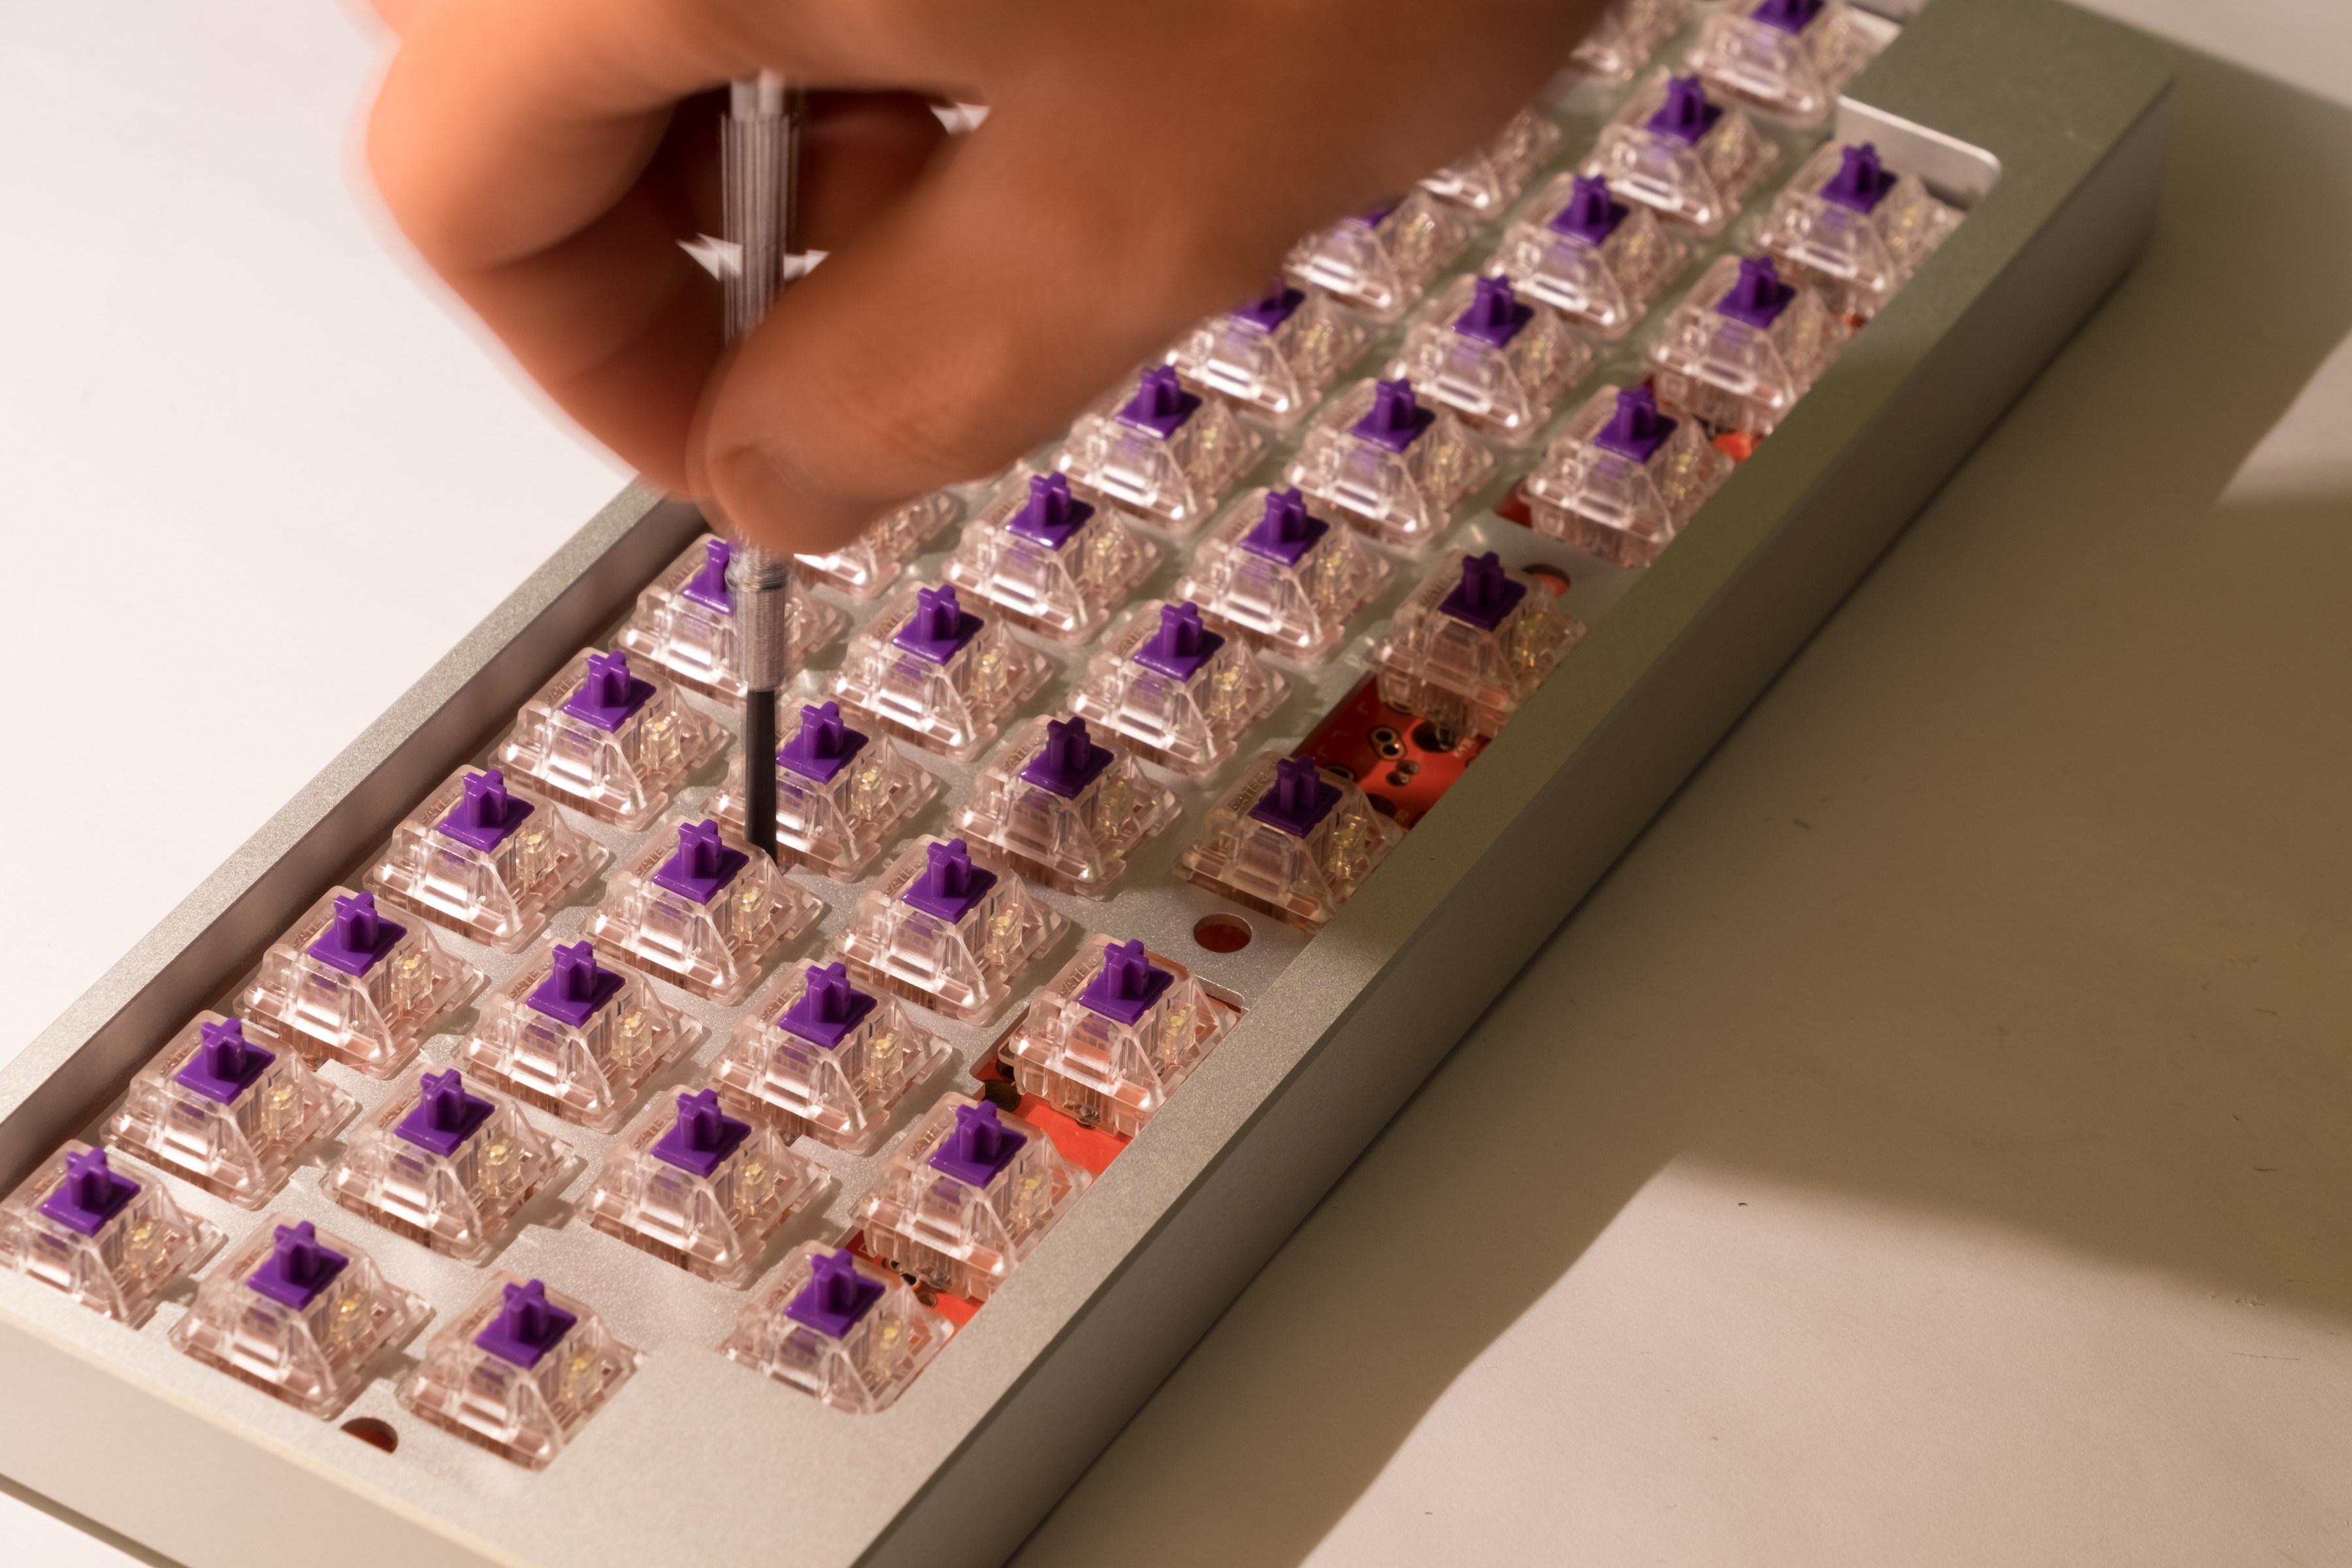
Next I started installing the switches. I placed 4 initial switches into the top plate and then guided to the holes on the board. This gave me a somewhat rigid structure to work from when adding the rest of the switches. I soldered them all in, and then inspected and made adjustments where needed.


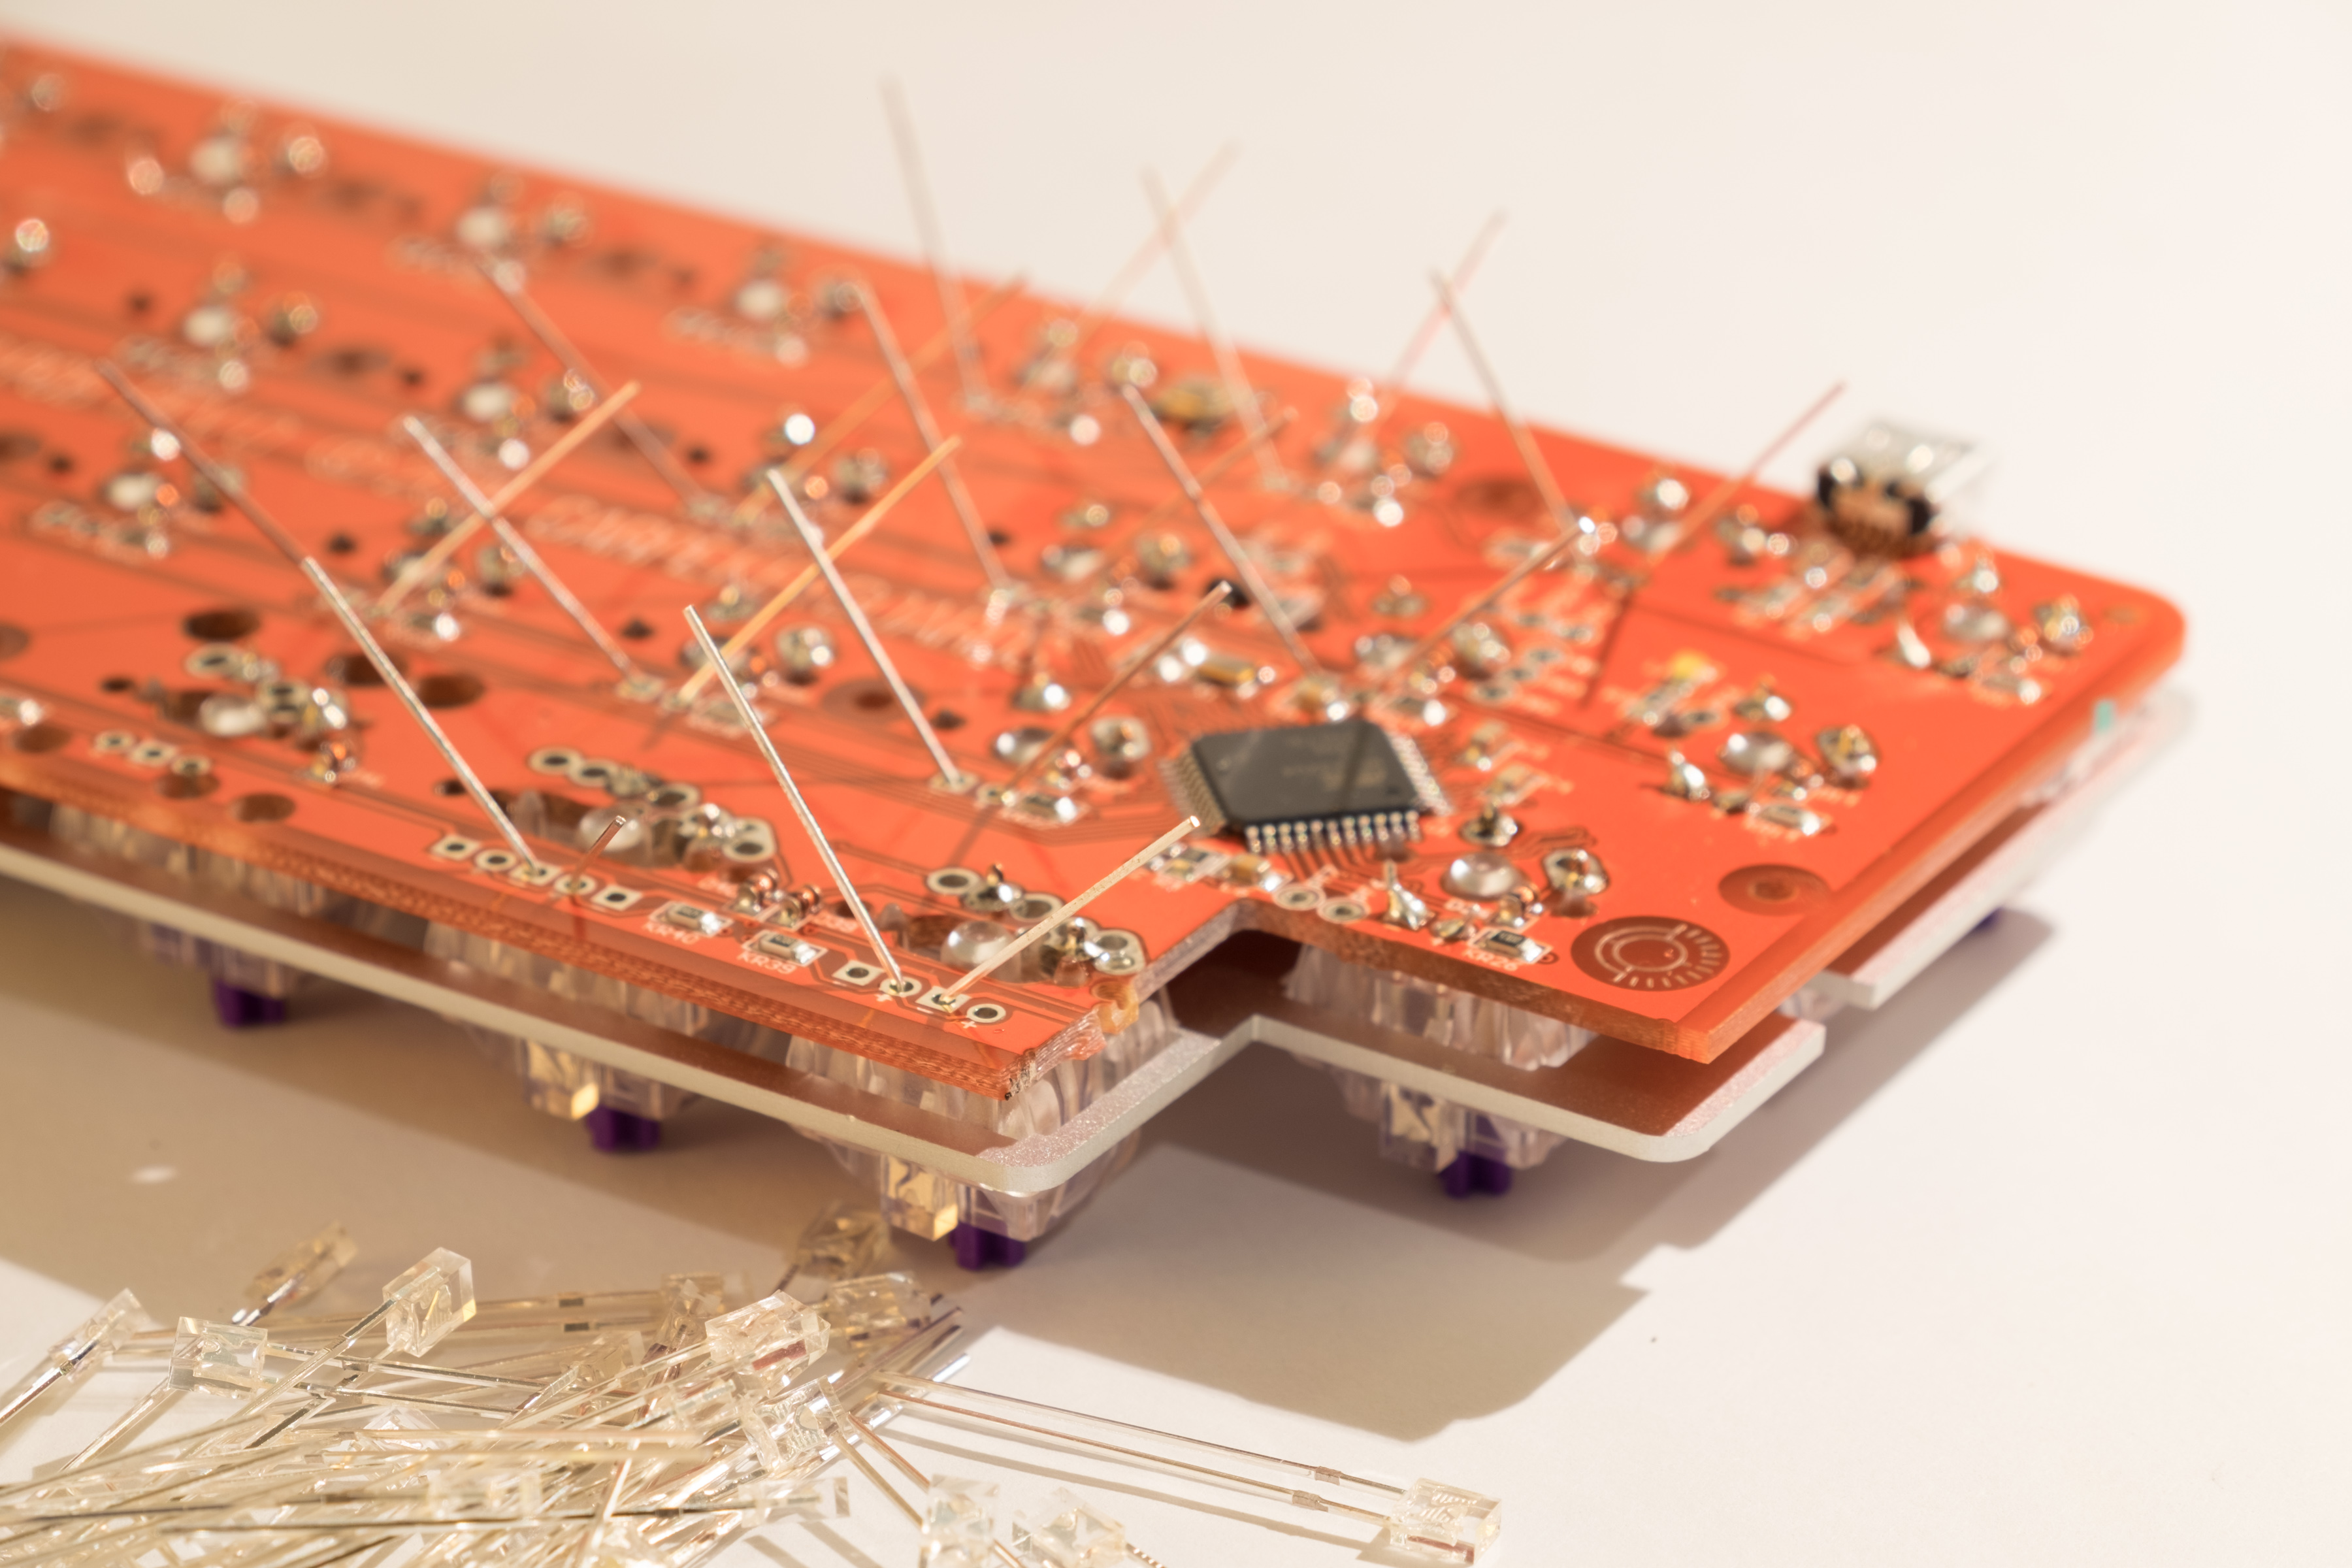
Next, I strung through the LED’s and soldered those in. I was working with the board upside-down, so I bent the leads to keep them in place. Before soldering, I also plugged in the board and checked that each would light up, in case there was a bad LED in the mix.

After completing the board, I installed into the case. I first added the bumpers to the bottom. After screwing the PCB into the case, I tested again. I also tried wiggling each switch to make sure my connections were good. I ended up pulling the board back out and strengthening a couple LED connections.

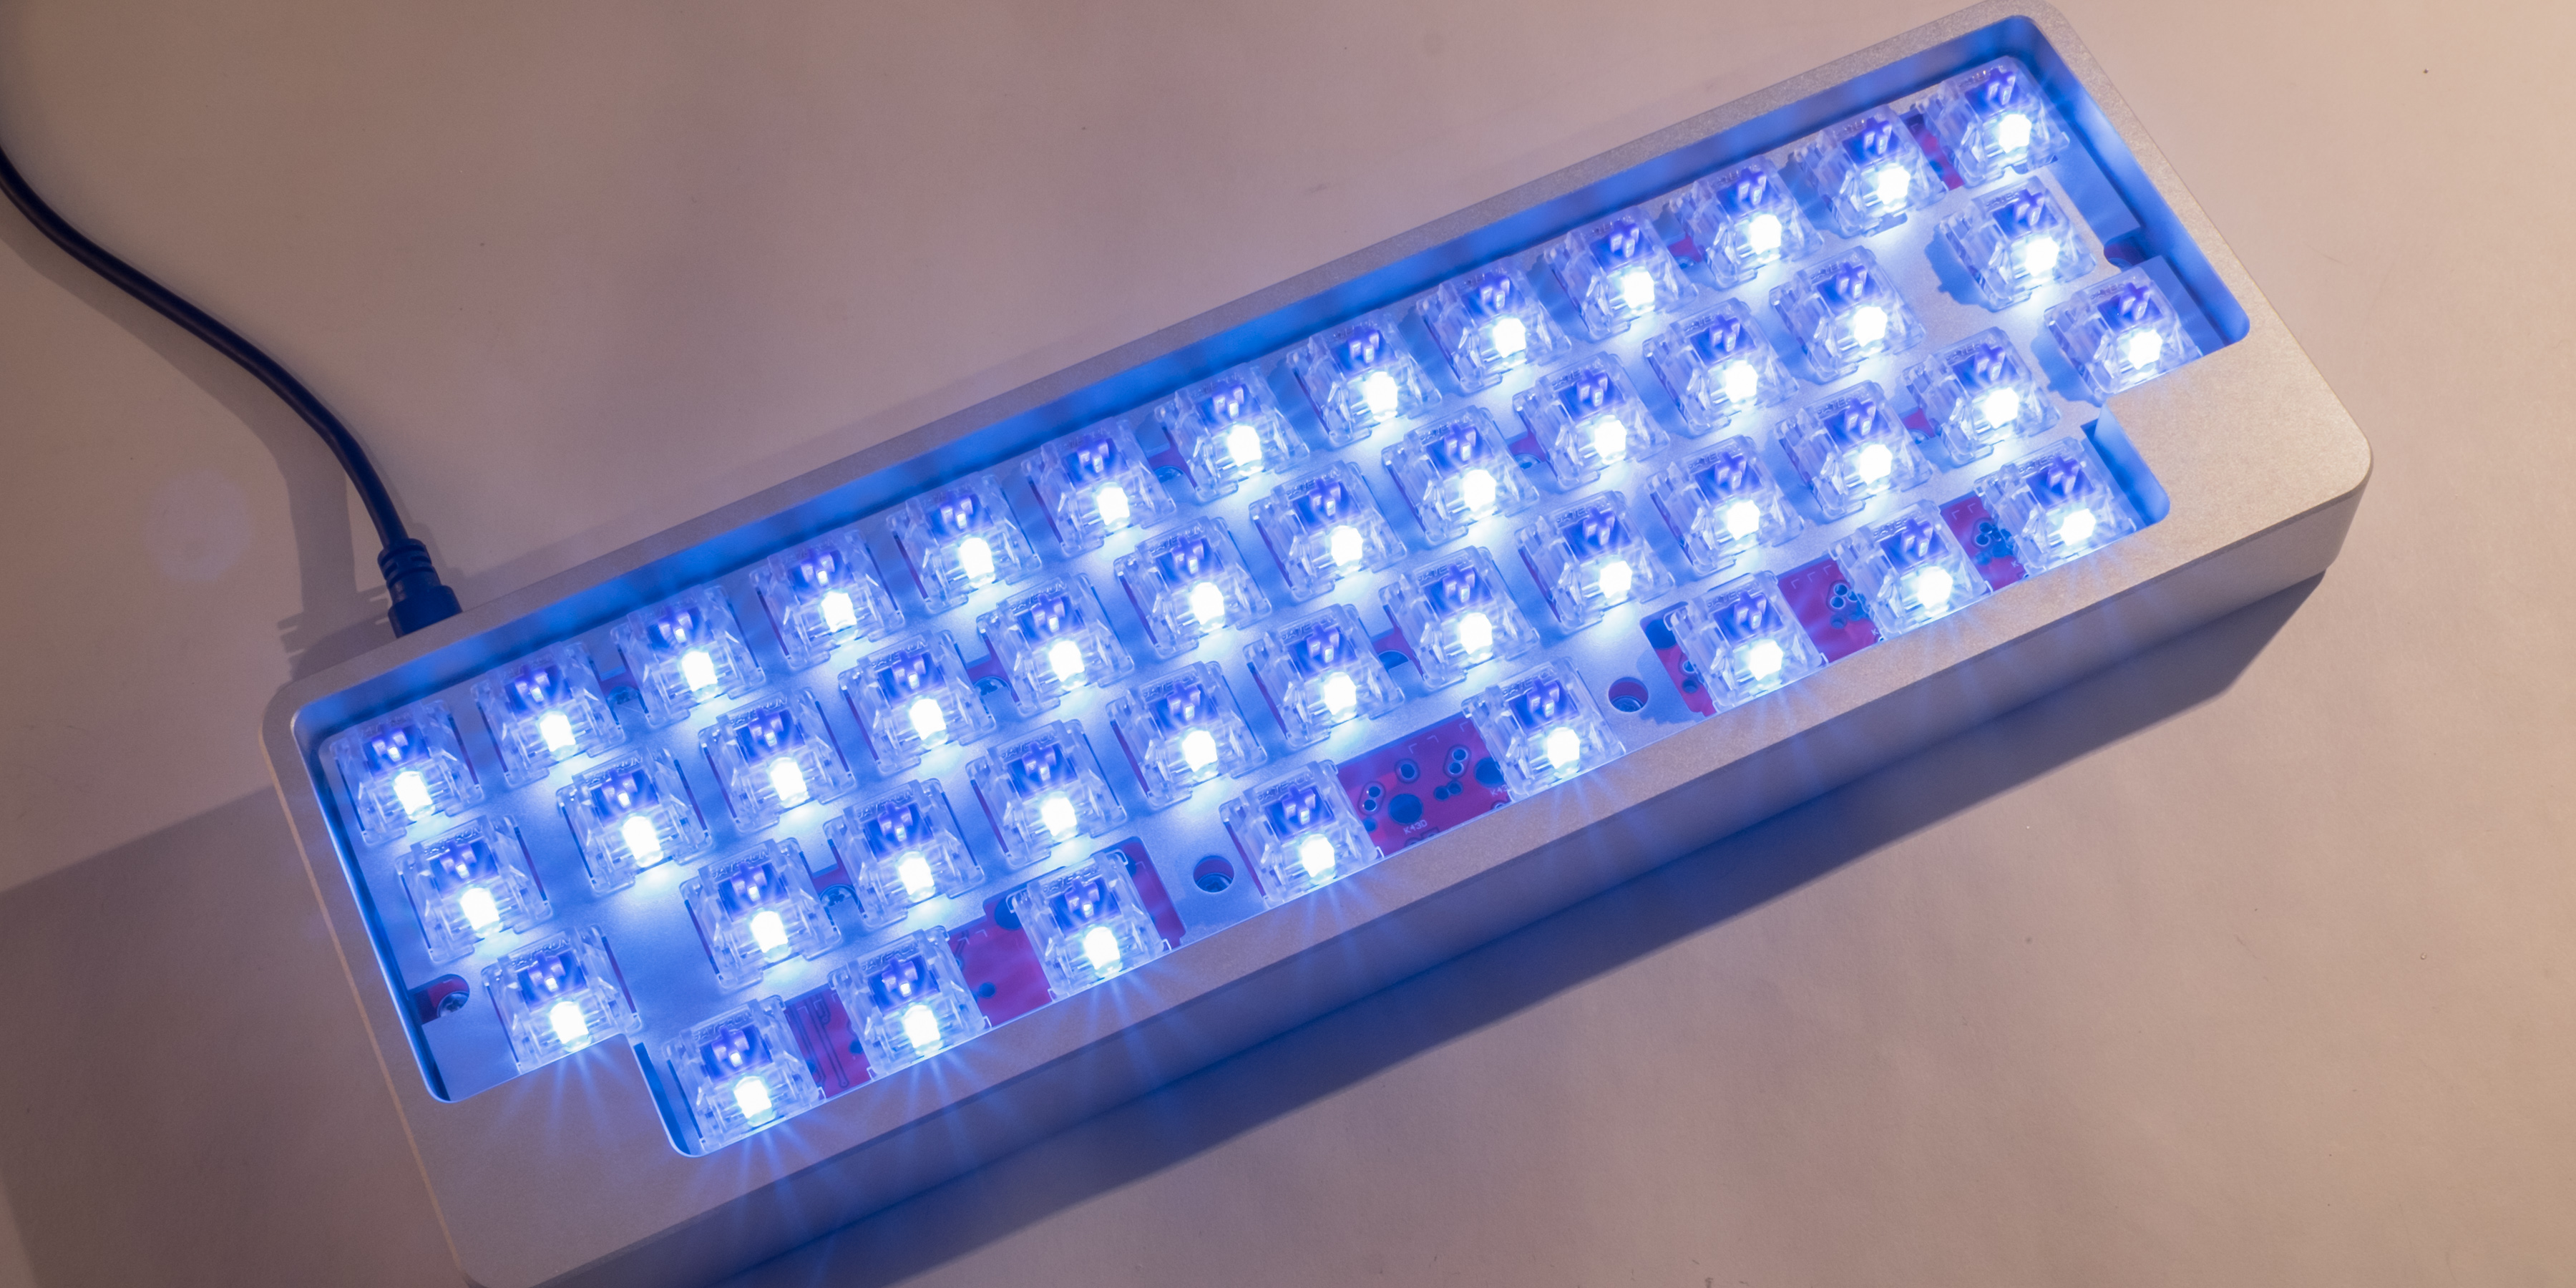
The LED’s are quite bright, but they can be dimmed and turned off by pressing a couple keys.
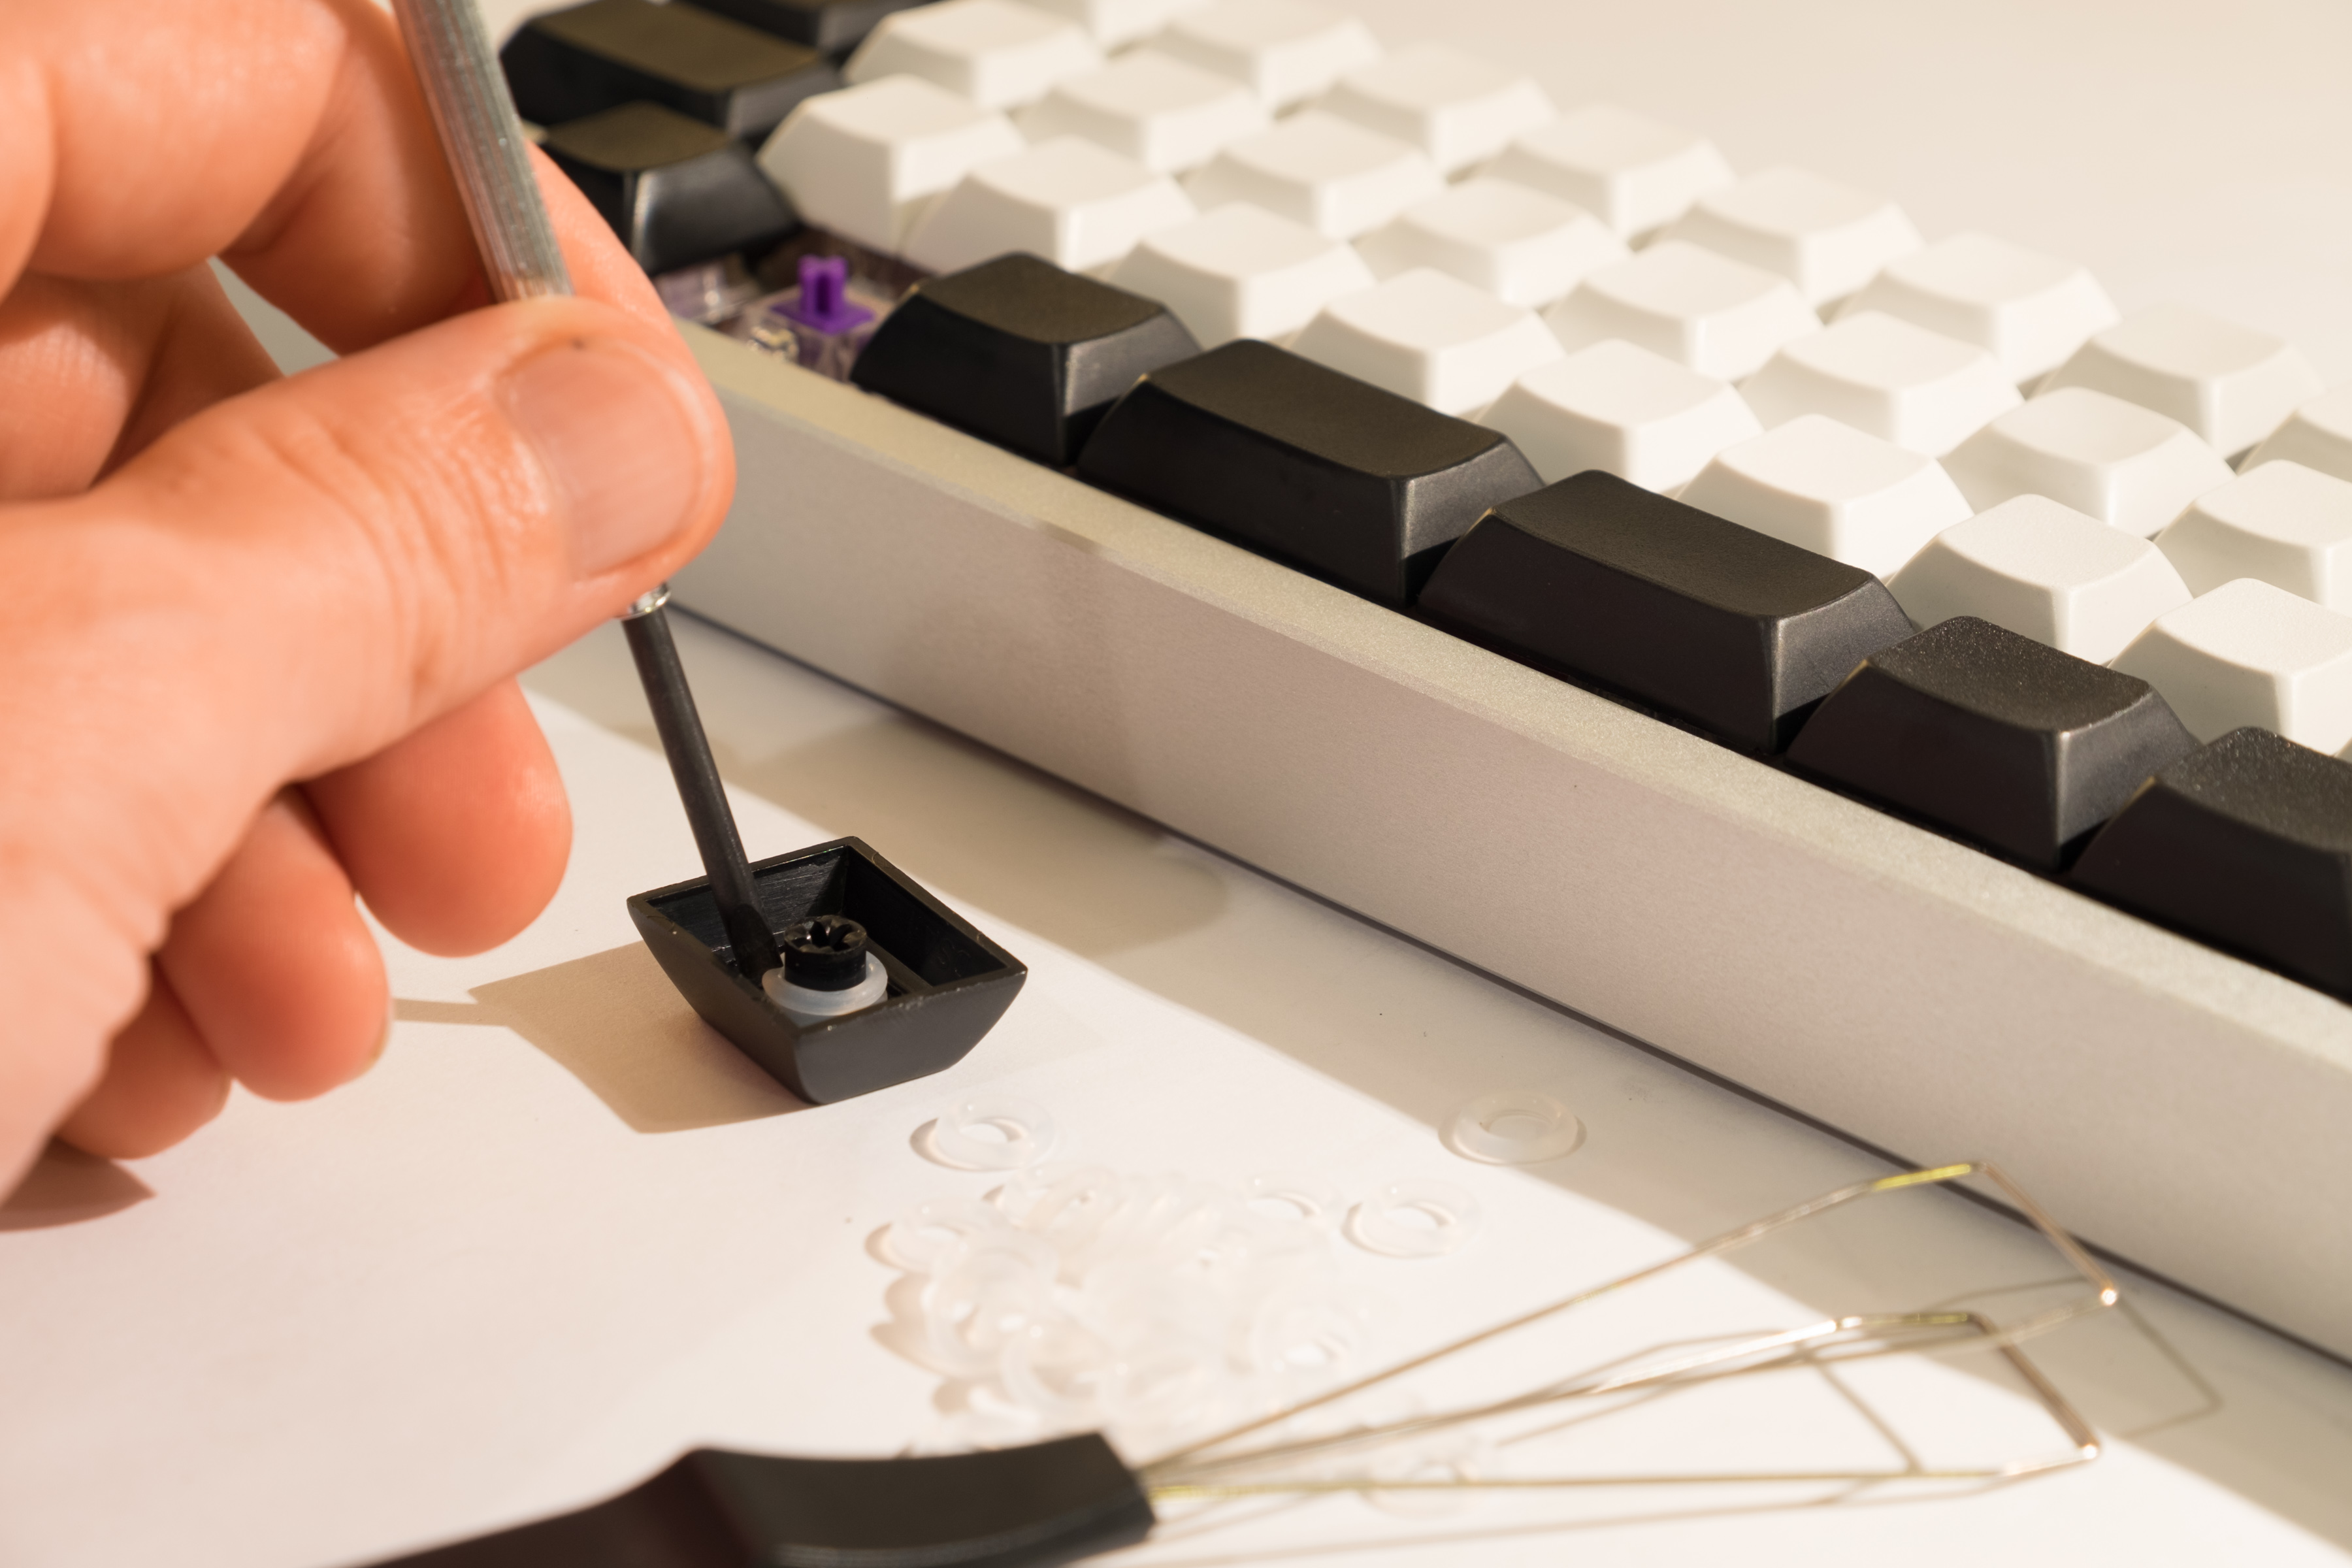
I then added my keycaps. I used two O-rings for each key after using the keyboard a bit. This helped the keys to feel a bit better to me. They help the sound when bottoming out as well.
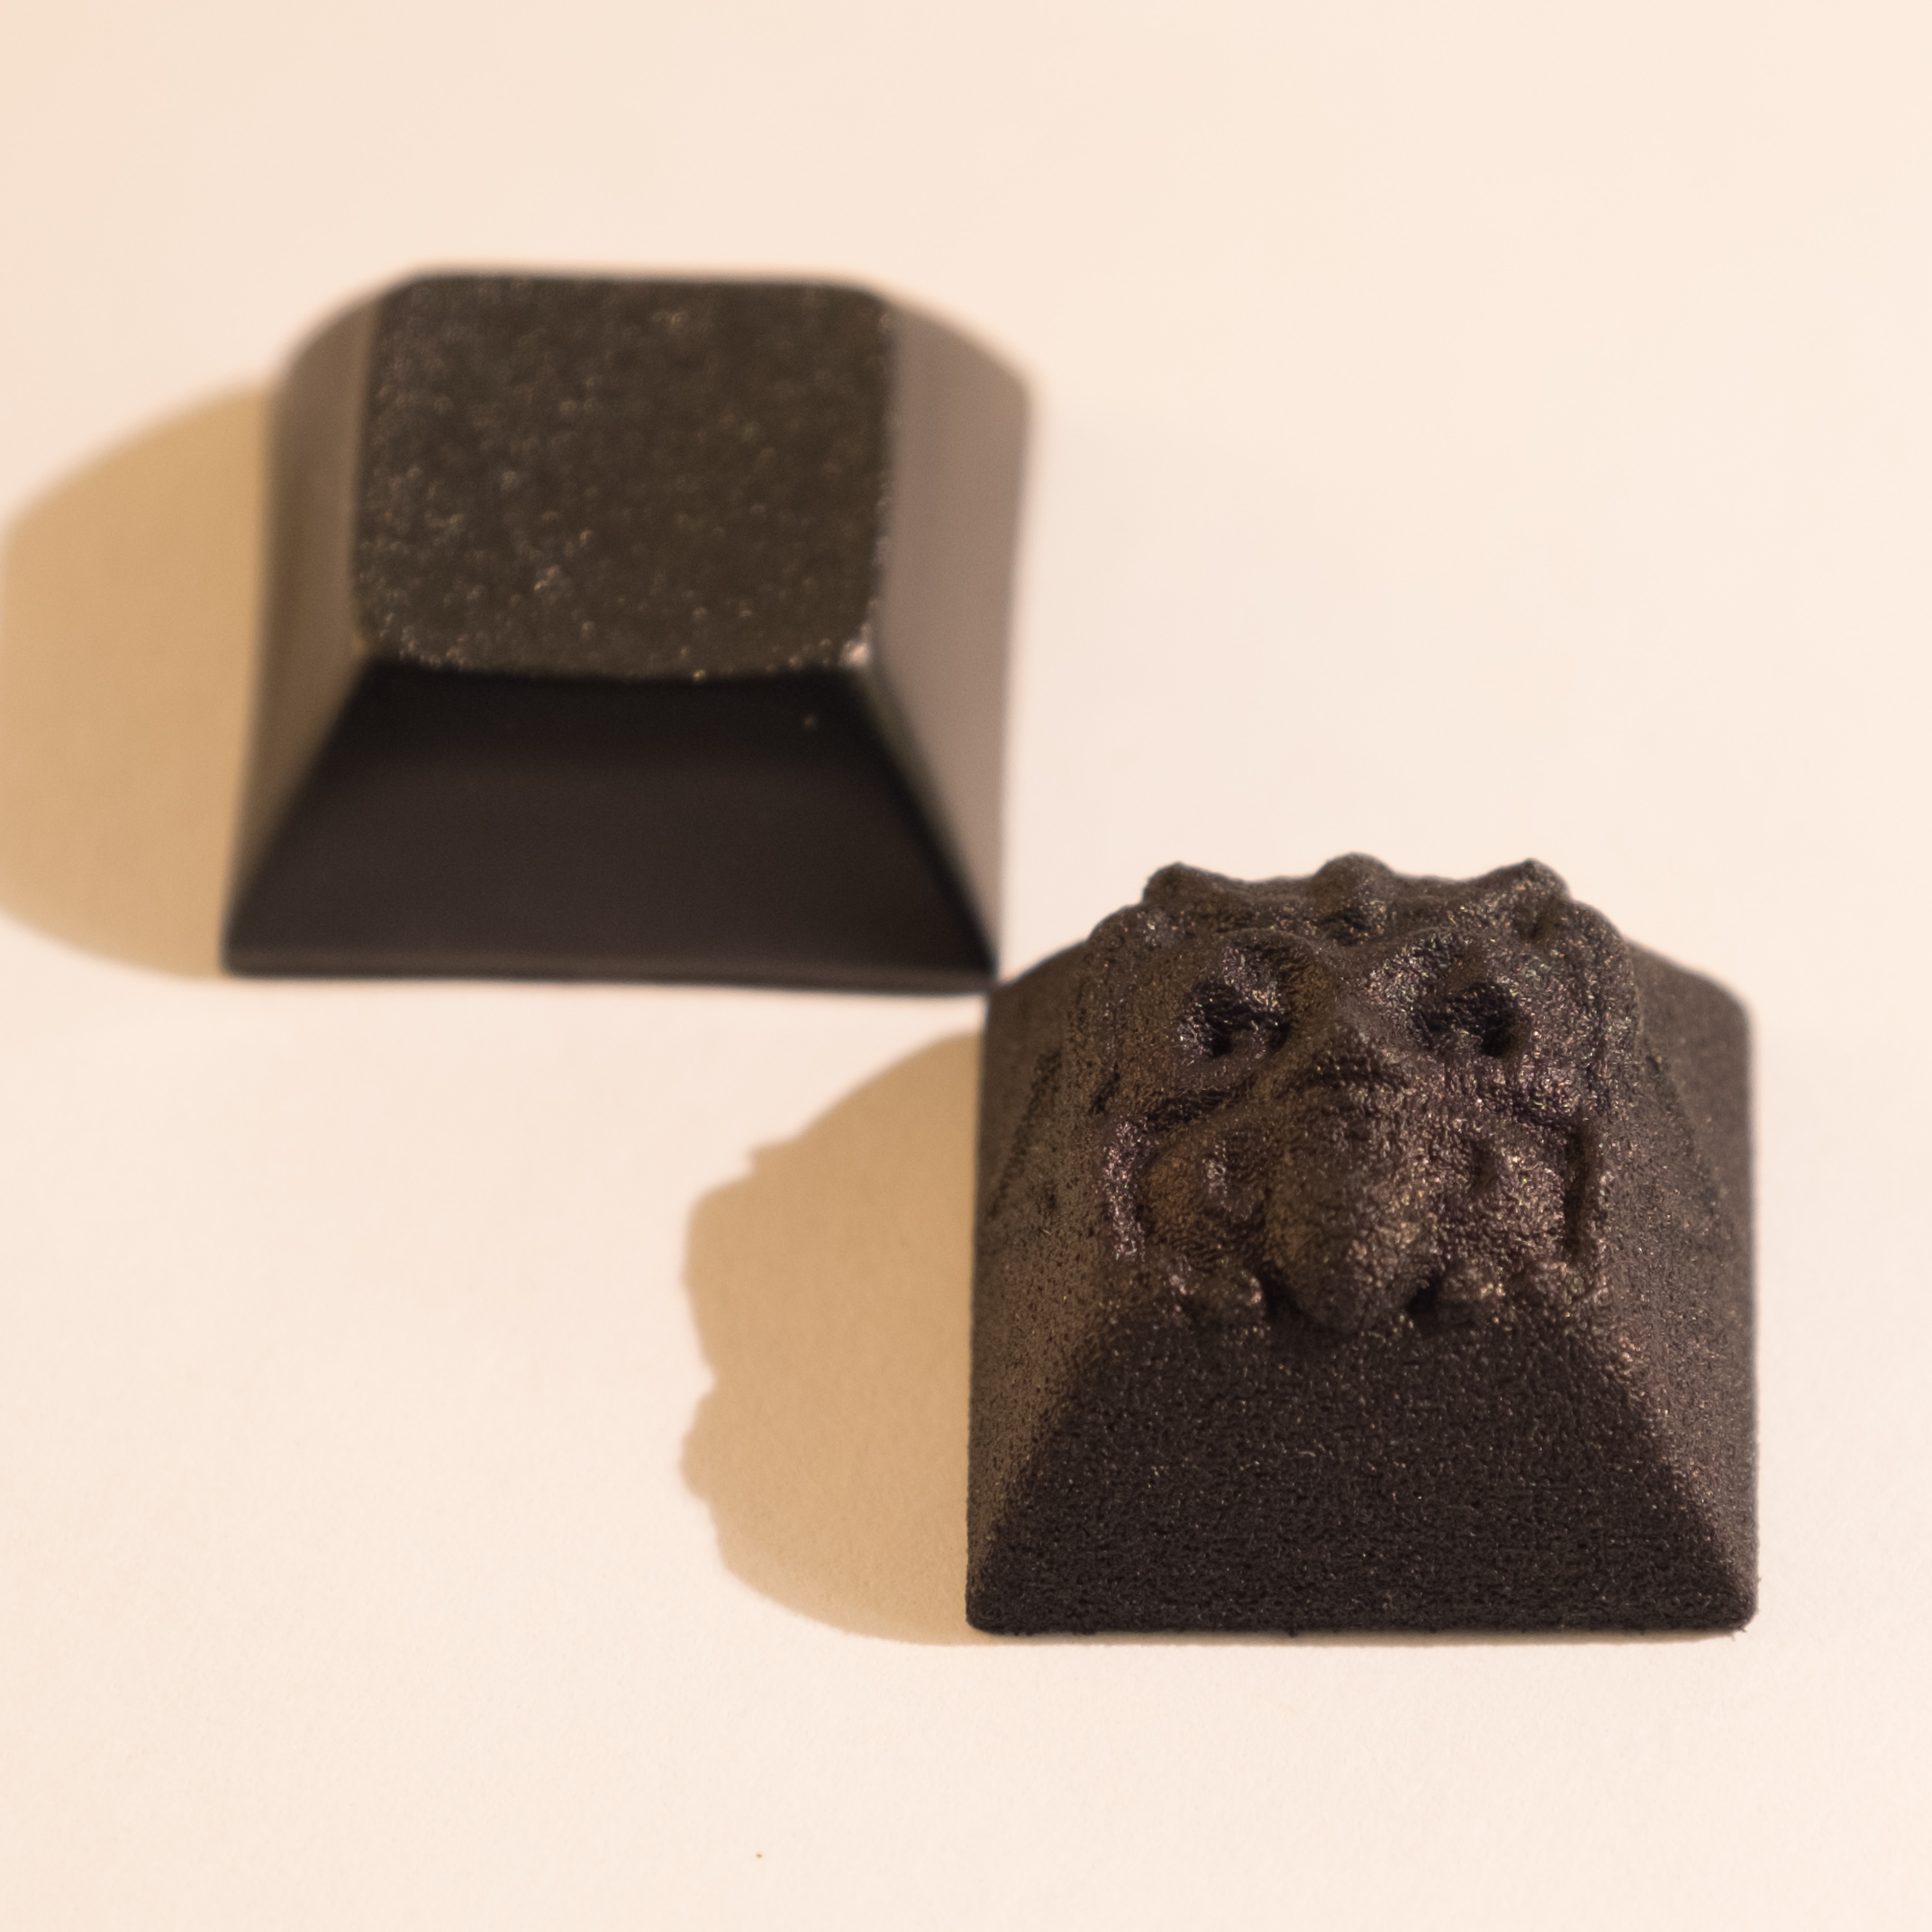
To give a bit more flair, I also printed a custom key to use in the Esc position. It’s an Aztec god of sorts. I just think it looks cool and was one of the few novelty options for the DSA profile, particularly where I could get it to match my color scheme.

Here it is fully assembled. My color scheme is built around the idea of separating my alphanumerics from my control keys. I also set a section in gray to denote the position of the numerals.
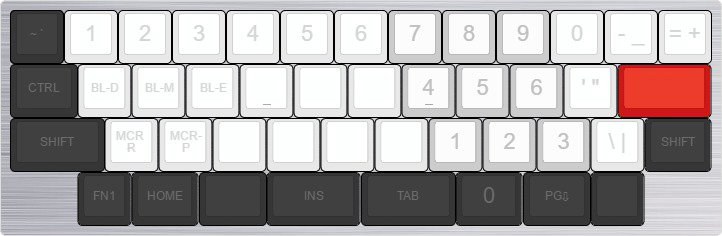
After testing that all keys worked as they should for the standard firmware, I moved along to program my own layout. The layout is one that I had devised over a couple iterations during the months where I was waiting for the parts to come in. Below are my layouts from the base, when using Fn1 (bottom left key) and when using Fn2 (bottom right key).
The layout is derived slightly from the layout on my HHKB. I still plan on using that keyboard when a quieter keyboard is more appropriate, so I wanted to make it easier on me when moving between the two. The Ctrl position is the same, and the arrow cluster feels like the exact same movement.
Another big theme was to set my common Function-layer keys to be on the other side of the keyboard as the Fn key. This allows for special characters and numbers to be used without having to move my wrists.
My full layout is available on keyboard-layout-editor.com.
-

- Standard Layer
-
- Fn1 Layer
-

- Fn2 Layer
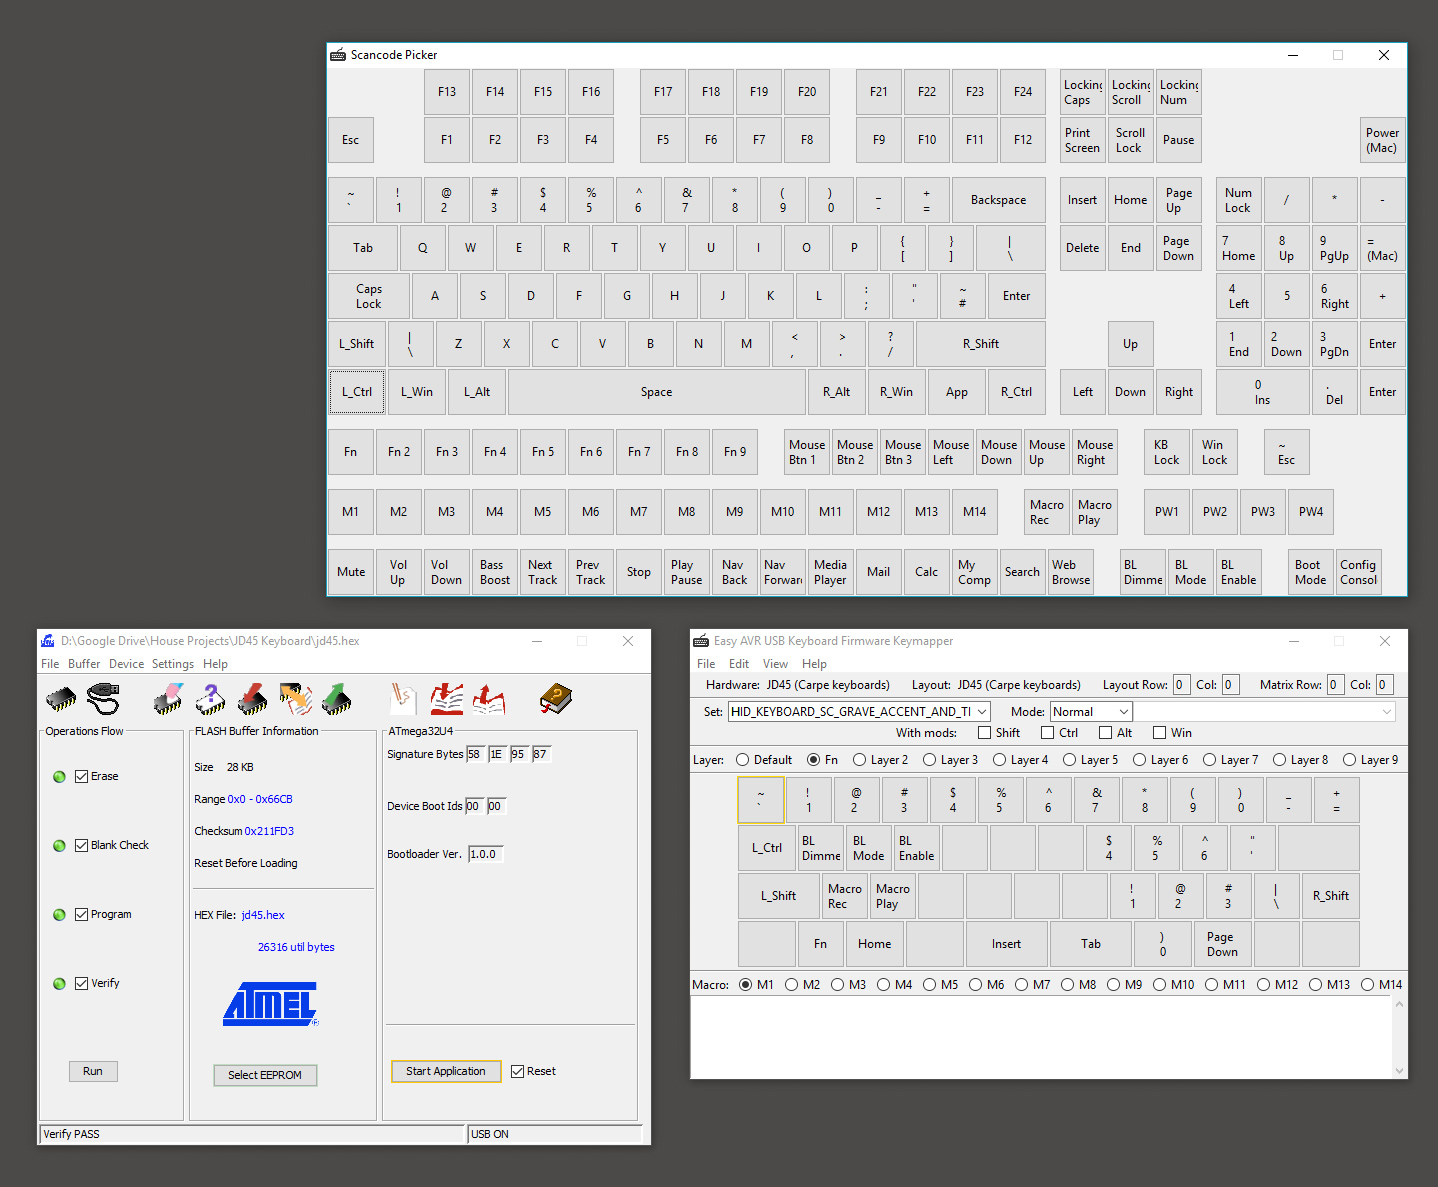
The software for building the layout and uploading was pretty straight-forward. I left a screenshot to show what the process looks like, but for details on how to do it, it’s best to check jd45.info.
I made a few mistakes with this project. Here are the areas where I went wrong.
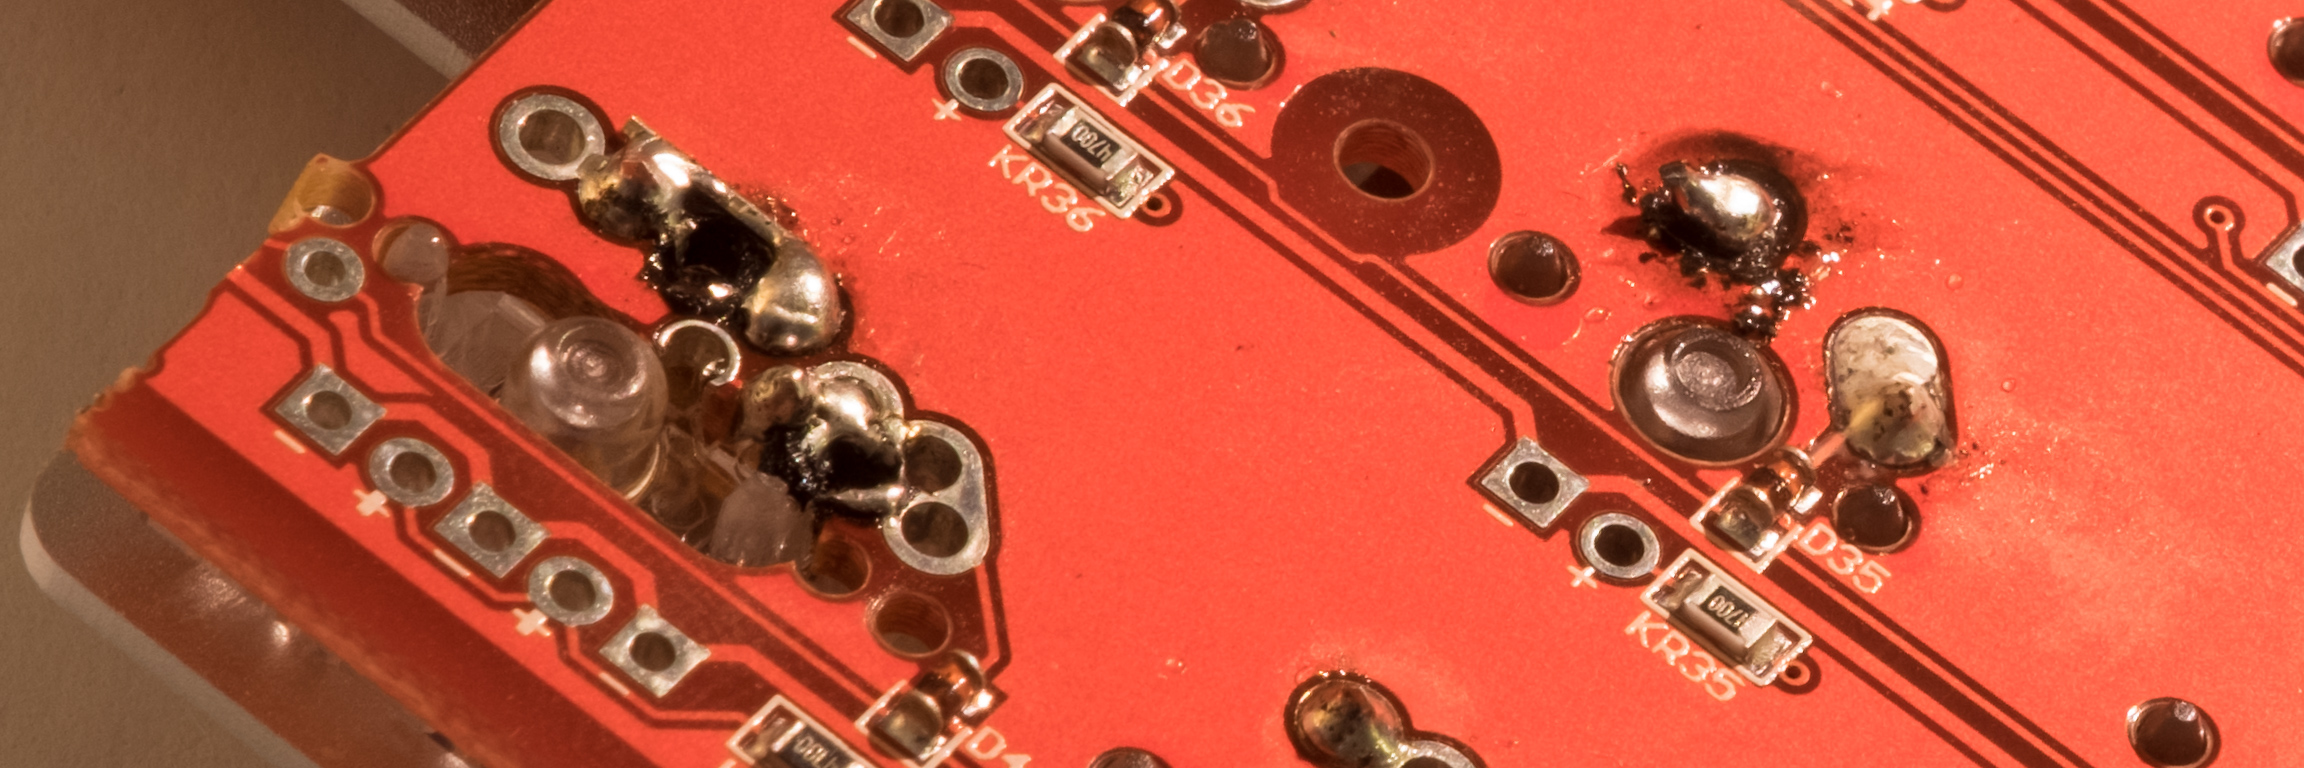
First, I put a switch in one position off from where it should have been. Without a desoldering tool, I had to make do with a suction bulb for cleaning ears. That didn’t work all that great, and I ended up burning a hole through the board trying to remove the switch. When installing the new switch, there was no longer any metal connecting the point to the trace, so I had to solder in a little wire to act as a bridge (shown to left on first picture below). It’s ugly, but it works.
In the same first picture but to the right, you’ll see a burnt spot with a glob of solder. That’s where I had to remove a defective switch. I burnt out the hole but I still had to use the same one, so I ended up sticking a wire into the hole to give the solder something to stick to besides the lead on the new switch. After a few tries, I got it to work. I cut off the top and melted it a bit more. Once again, ugly, but it works.
In the bottom picture, you can see the bottom of one of the switches is melted. I was using a butane soldering iron and there’s a hole where excess heat blows out. If you use one of these, make sure that this hole is facing upwards. The switch still worked and felt the exact same, so I didn’t bother replacing it. I figured I’d do more harm than good by doing that.
Lesson learned here is to have the proper equipment. Get a good soldering iron, and have a desoldering tool on hand.

Overall, I really like using this keyboard. It’s taking some getting used to specifically for using the numbers and special characters. The split spacebar with the backspace under my thumb is especially nice. I’ve been programming with this for a couple days at the time of writing, and I am still slower with this, but I feel like I’m getting quicker. Parenthesis, dash/underscore and quotes are the ones that I’m finding myself hitting wrong the most when I’m working, but I expect that to go away shortly after muscle memory builds up a bit more.
Edit: After a couple weeks of use, I’ve gotten used to the layout and I much prefer it over even my HHKB layout. It feels perfect to me.
